Course descriptionHere we play
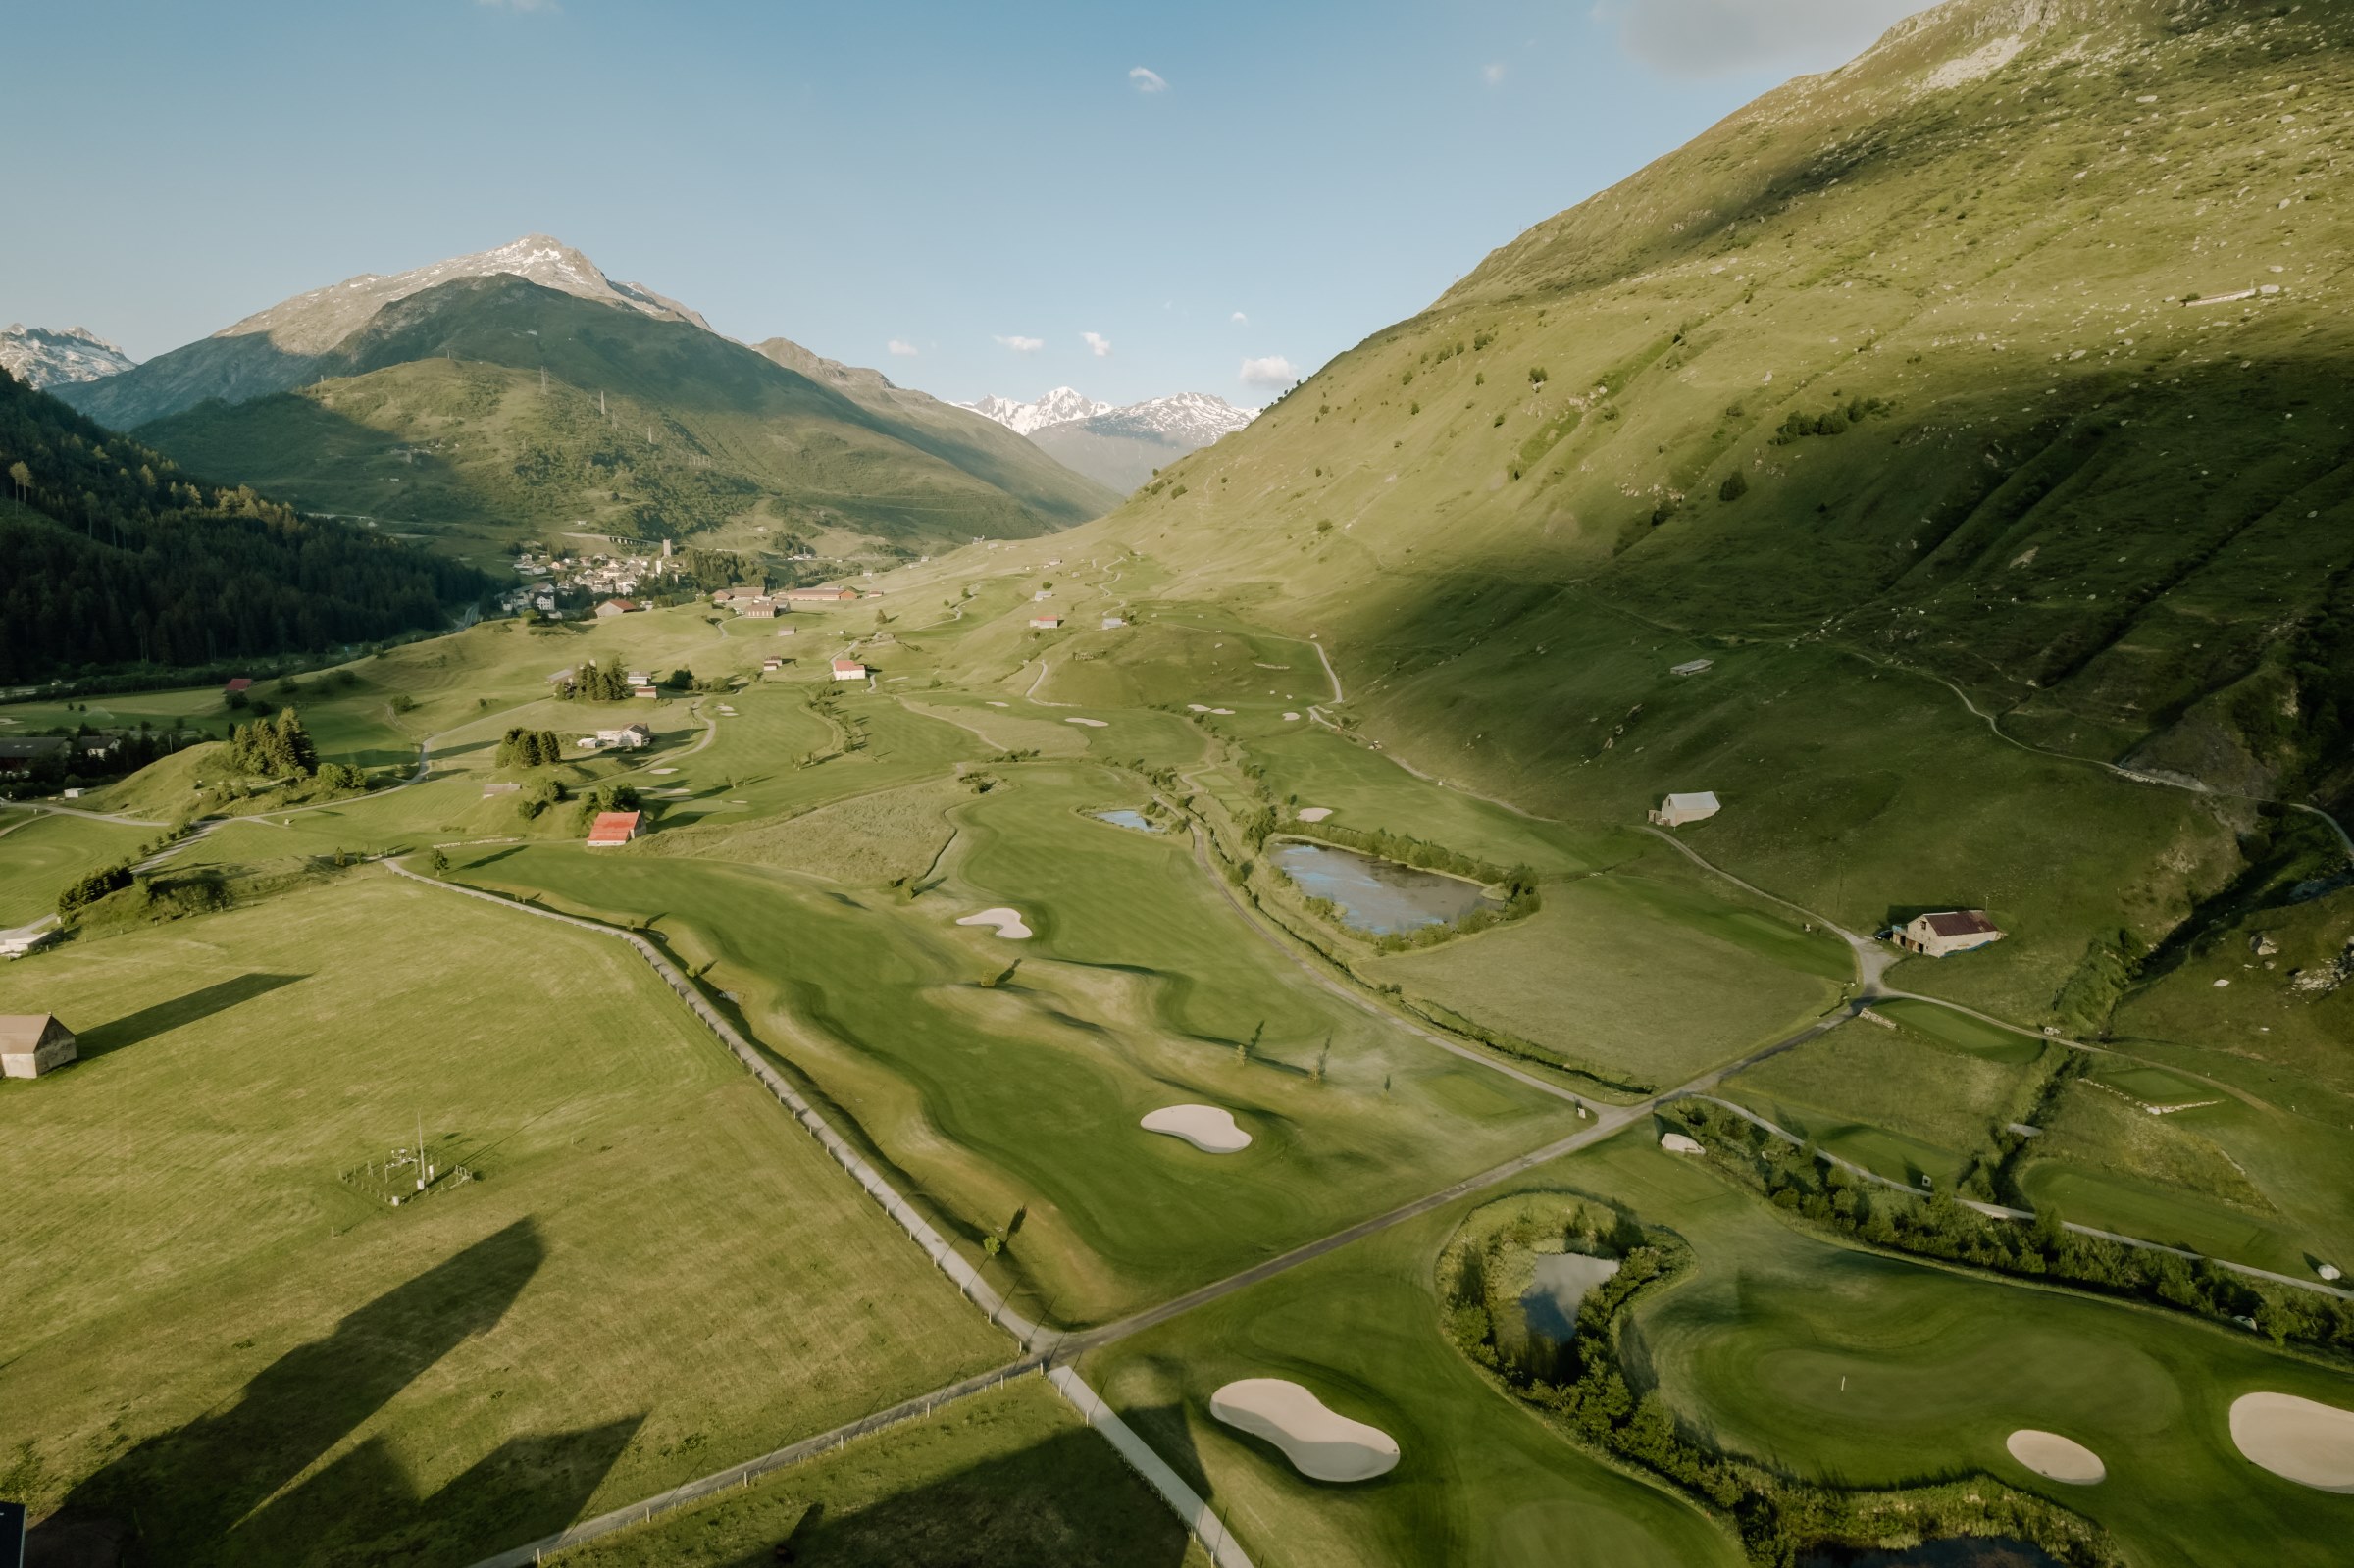
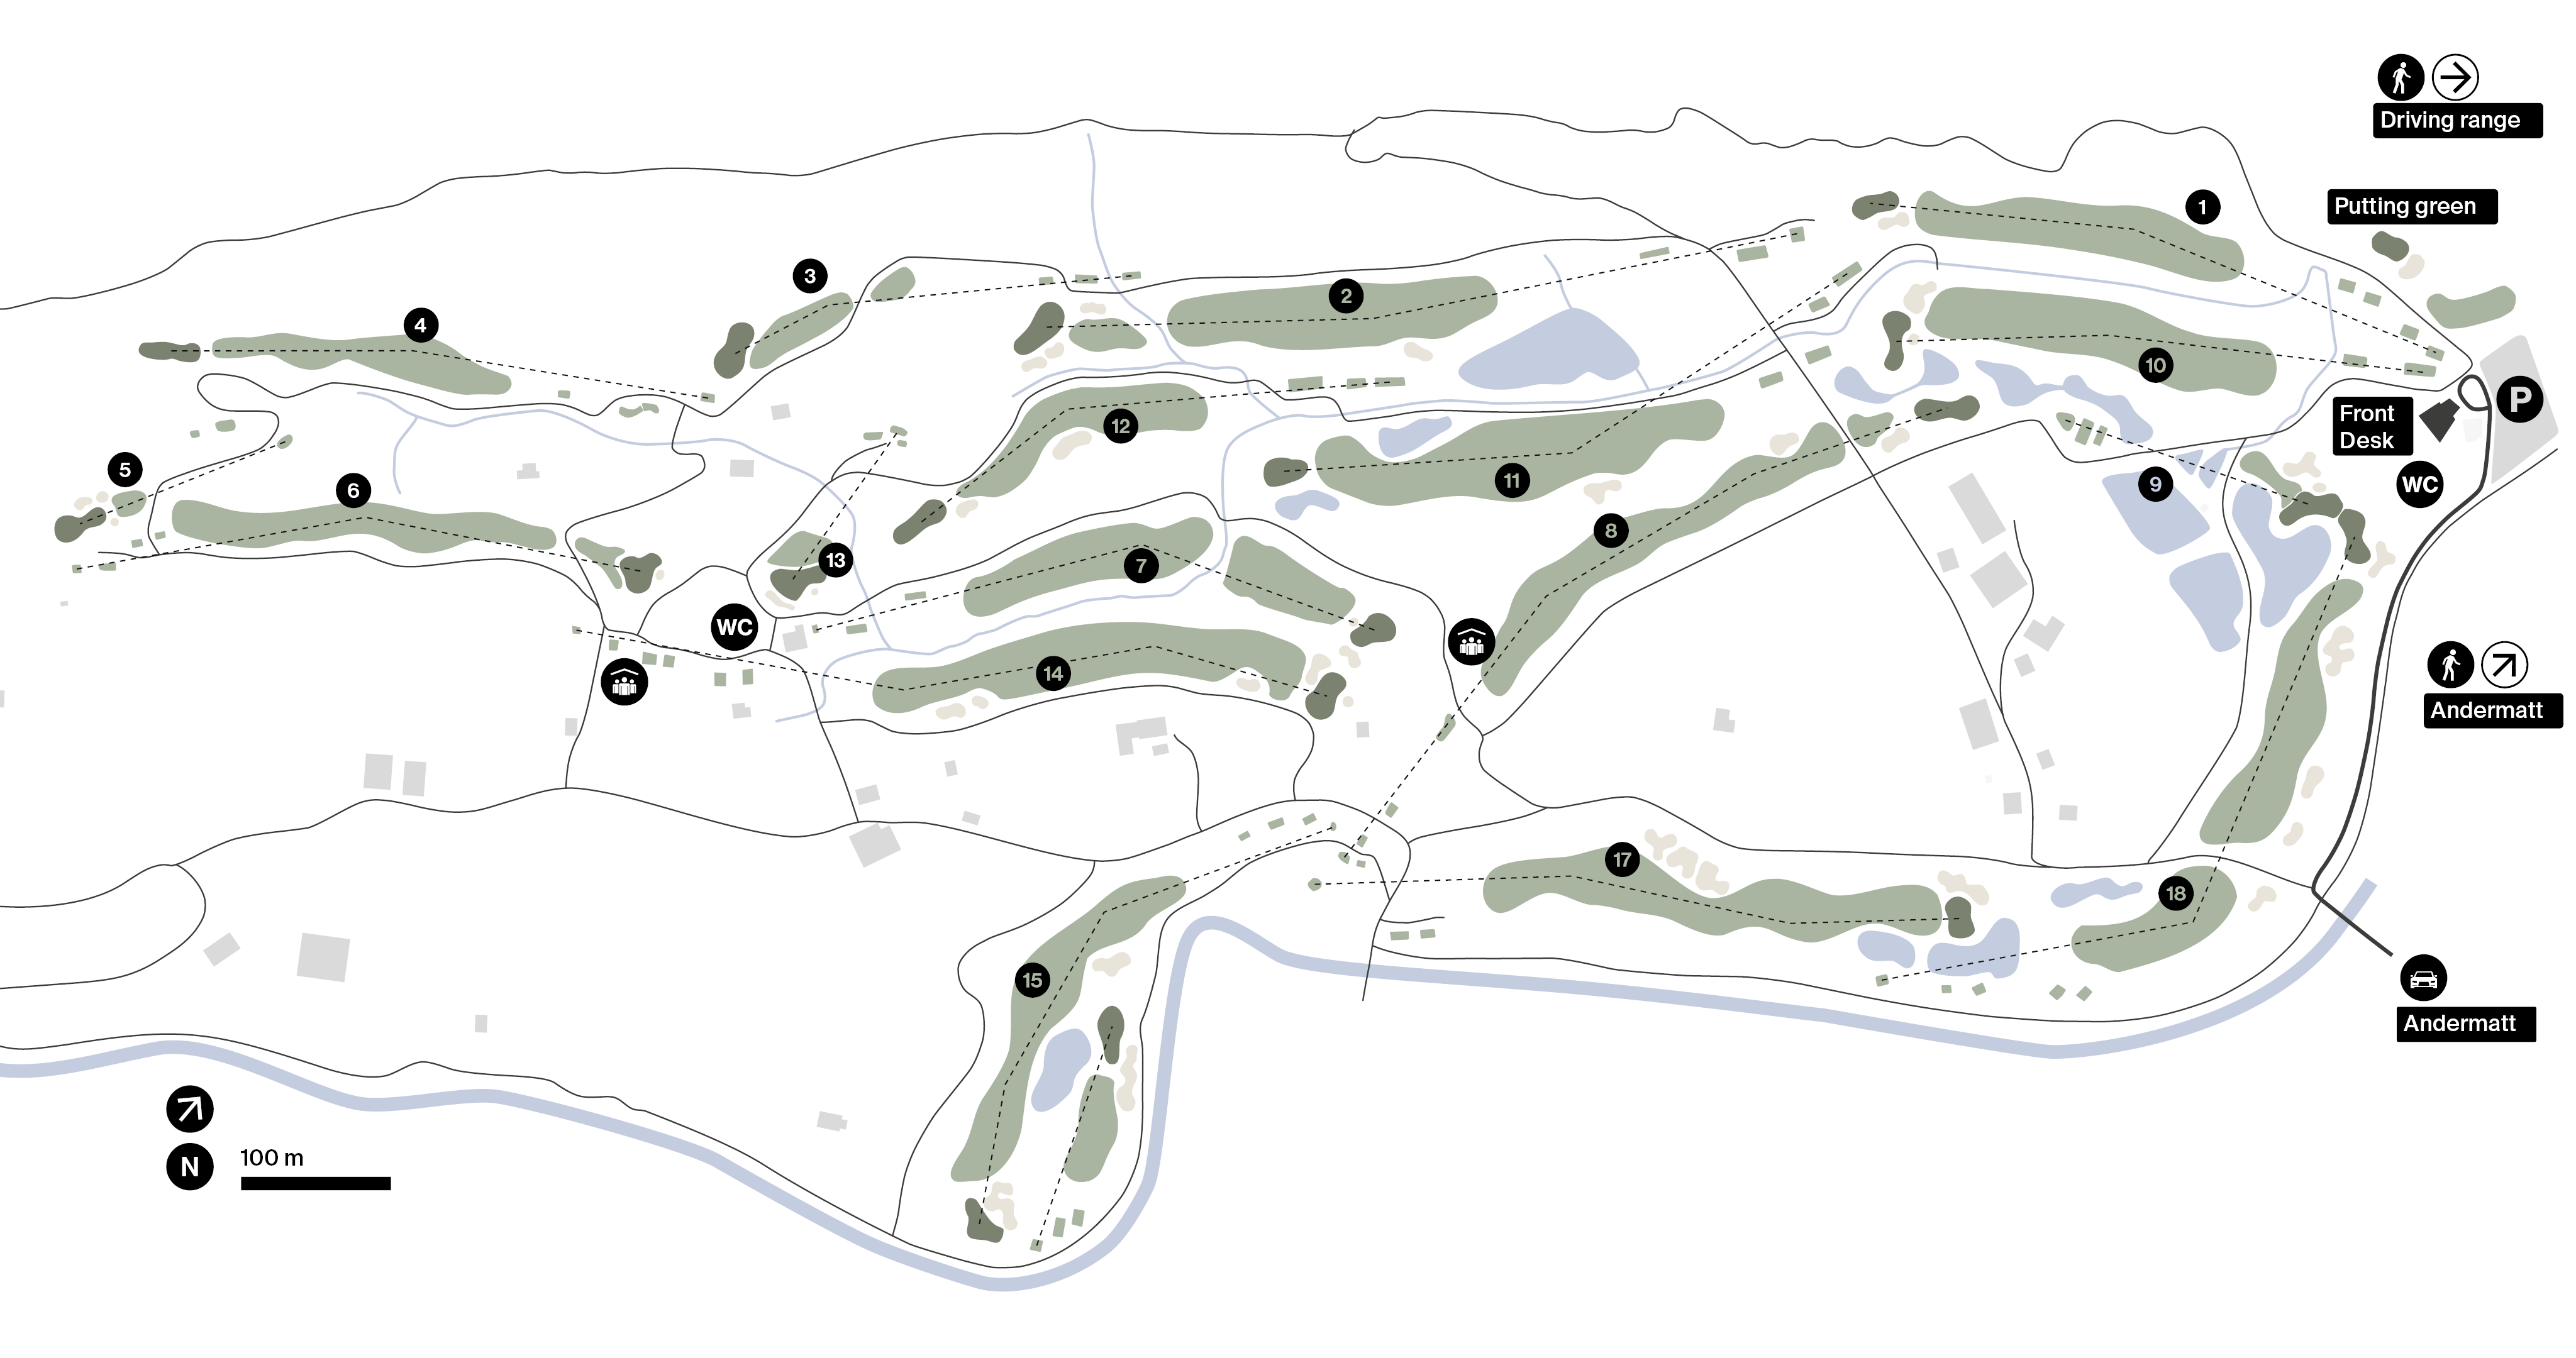
The 18-hole Andermatt Golf Course meets international tournament standards. It is six kilometres long and 130 hectares in size.

Hole 1
PAR 4
Favour the left side of the fairway from the tee which leaves a flatter lie. The approach shot should be hit high and soft to prevent the ball from rolling off the green.
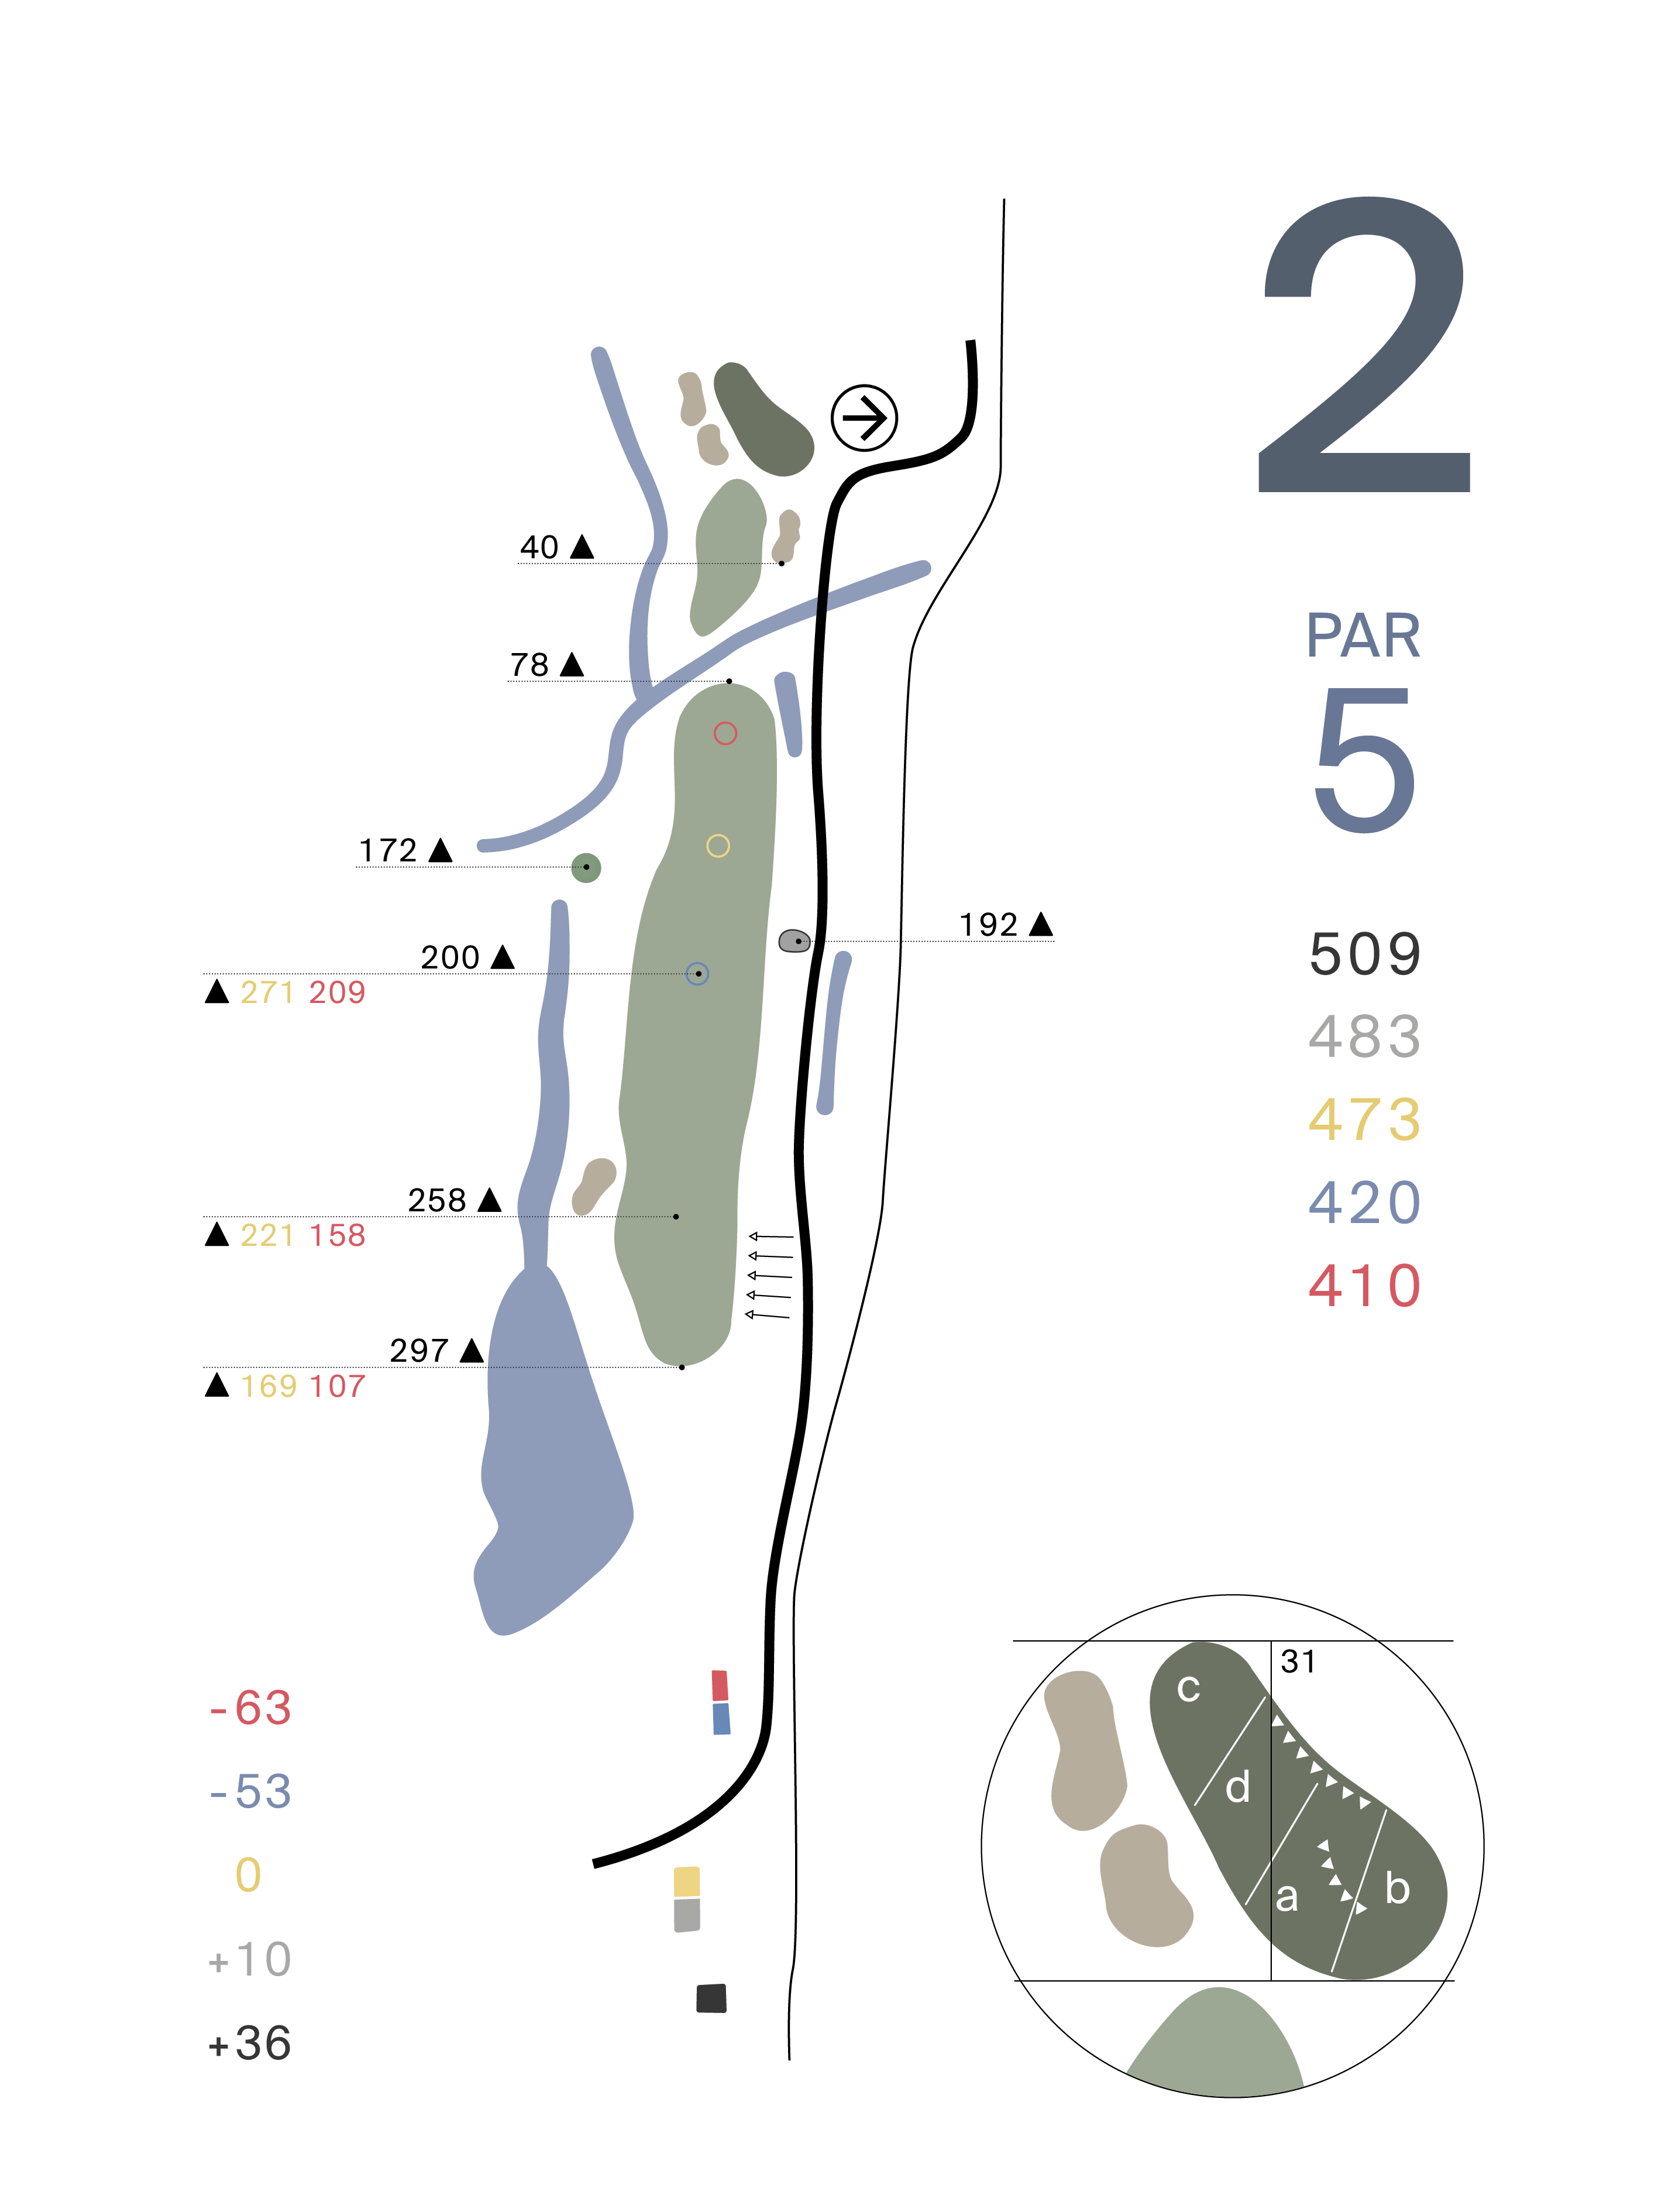
Hole 2
PAR 5
Keep drive between the rock right and bunker left. Be aware of the stream that runs across the fairway, lay up when in doubt to leave a short approach.
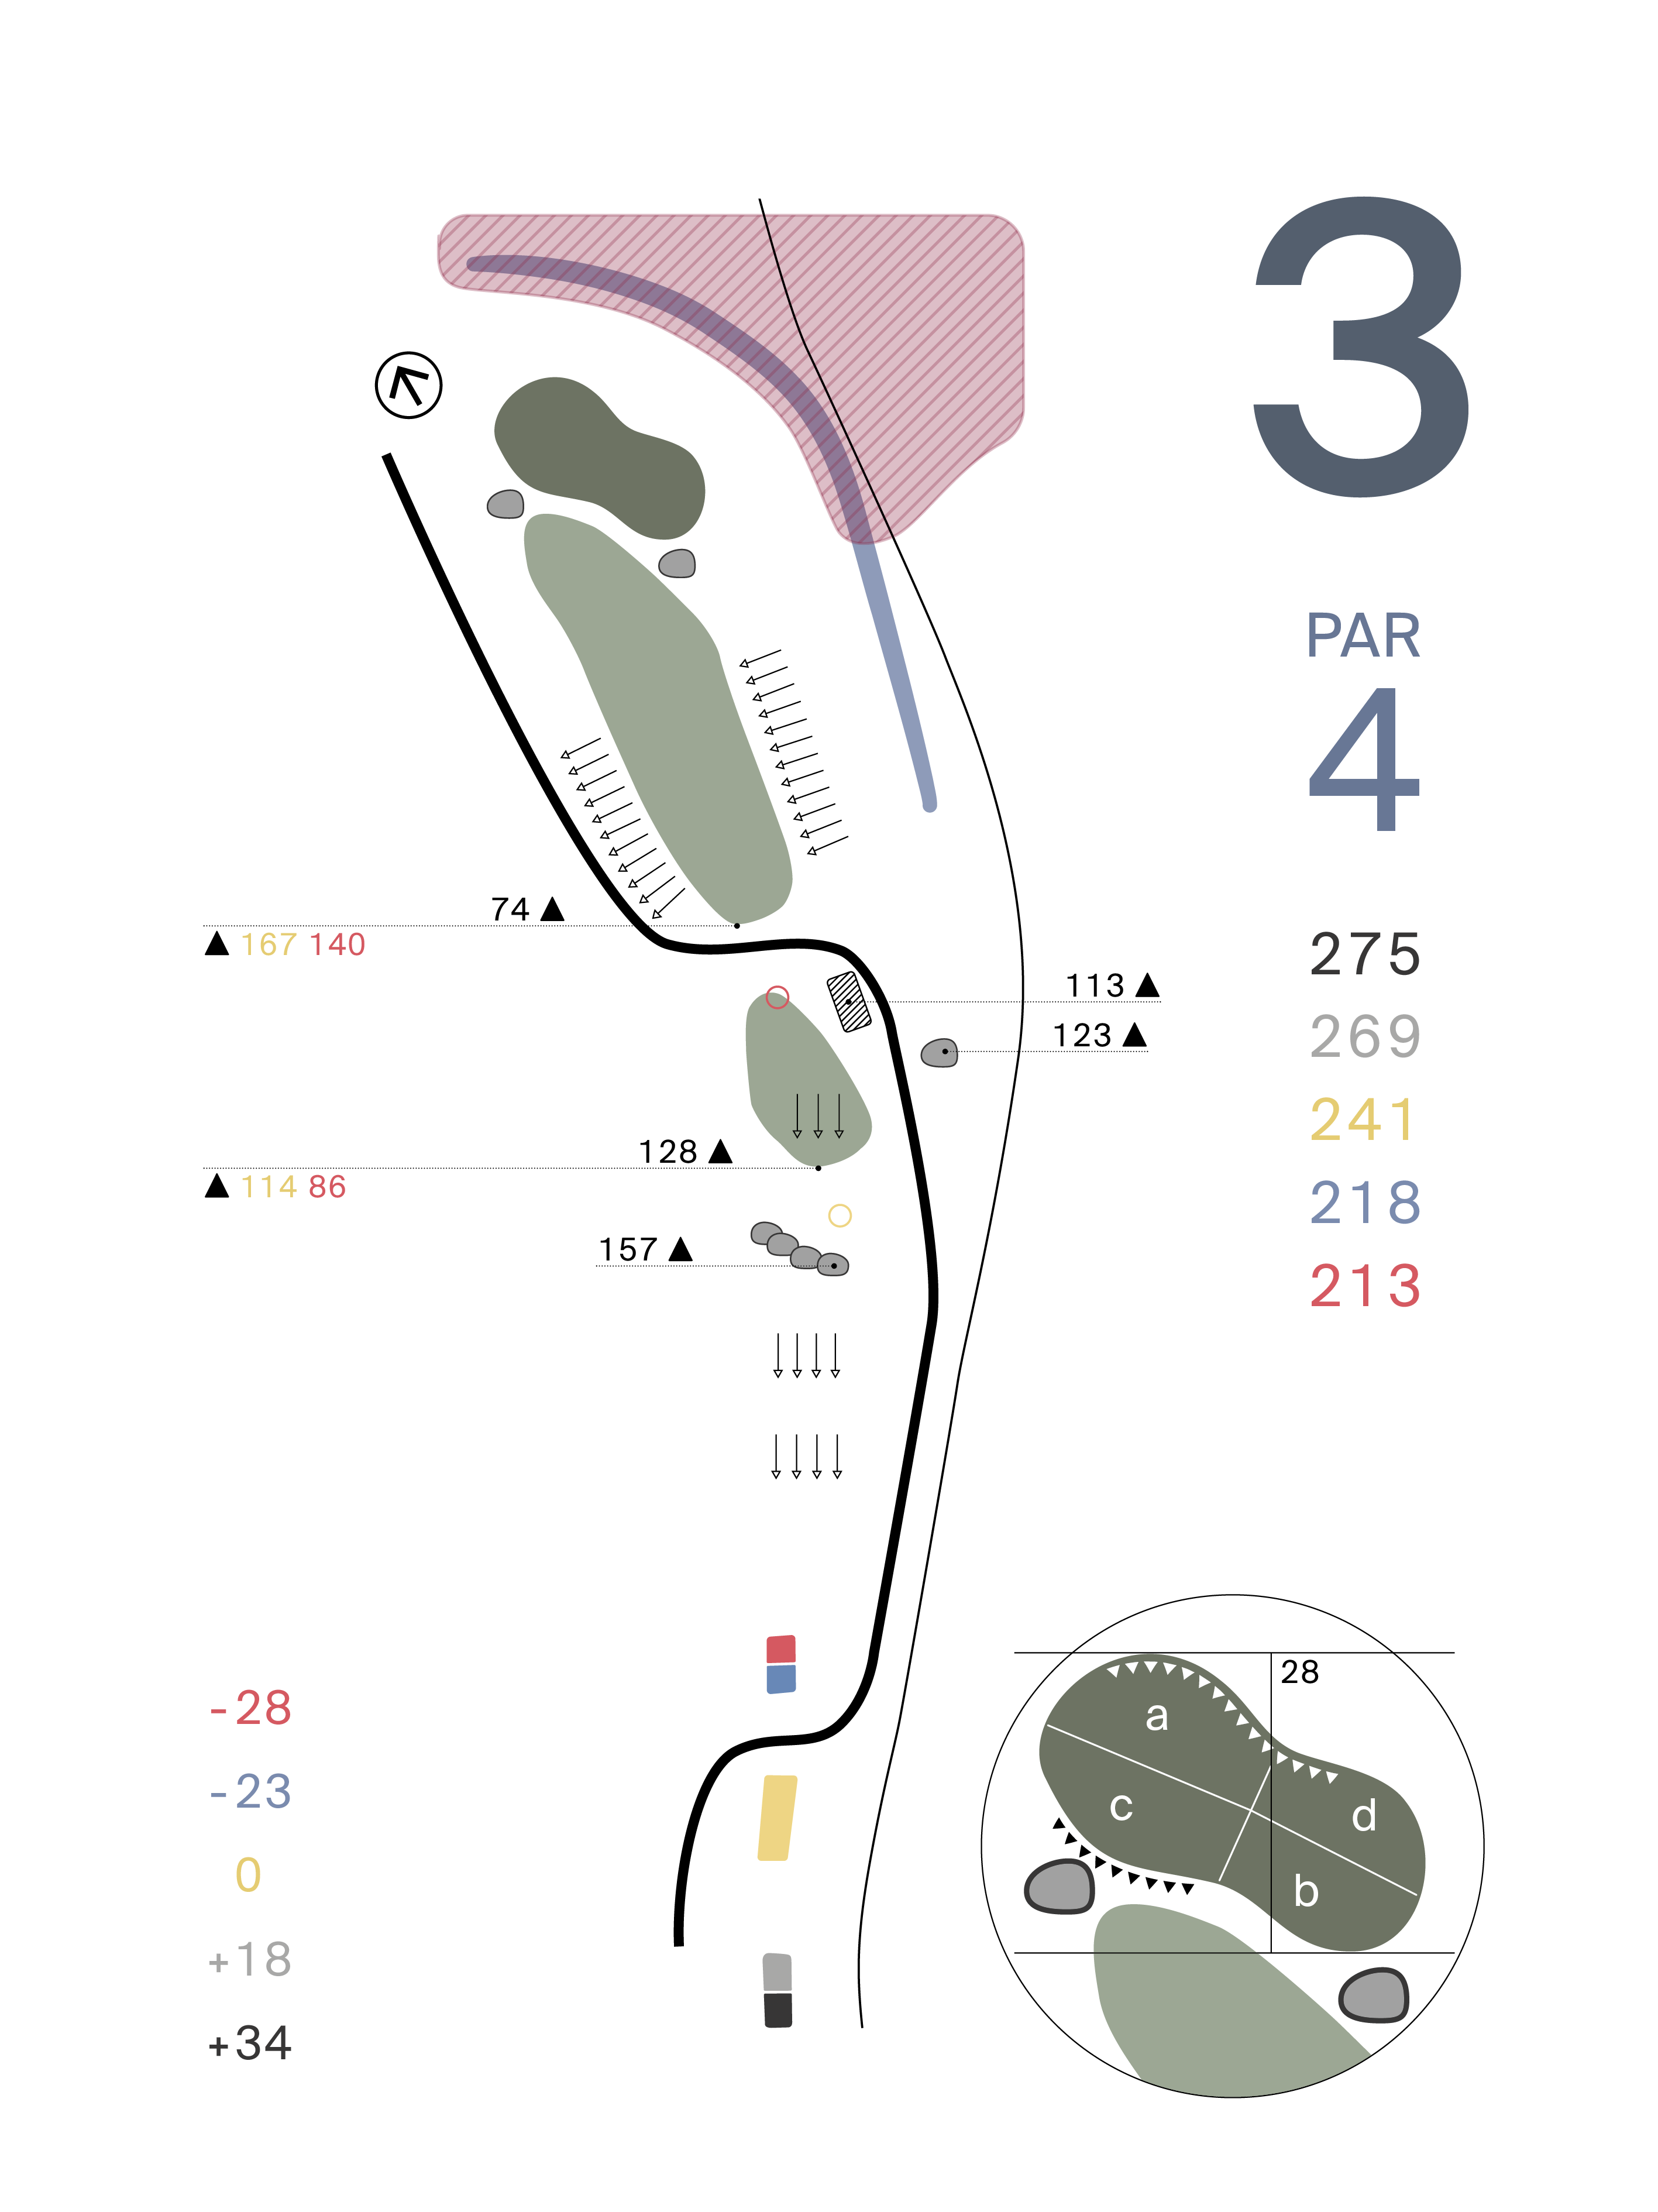
Hole 3
PAR 4
Take a lofted fairway wood off the tee. Once over the wall it is maximum 150 meters to the green, and better still over the road leaves a short pitch.

Hole 4
PAR 4
Favour the right side of the fairway from the tee. Take an extra club length on approach shot to this receptive three-tiered green.
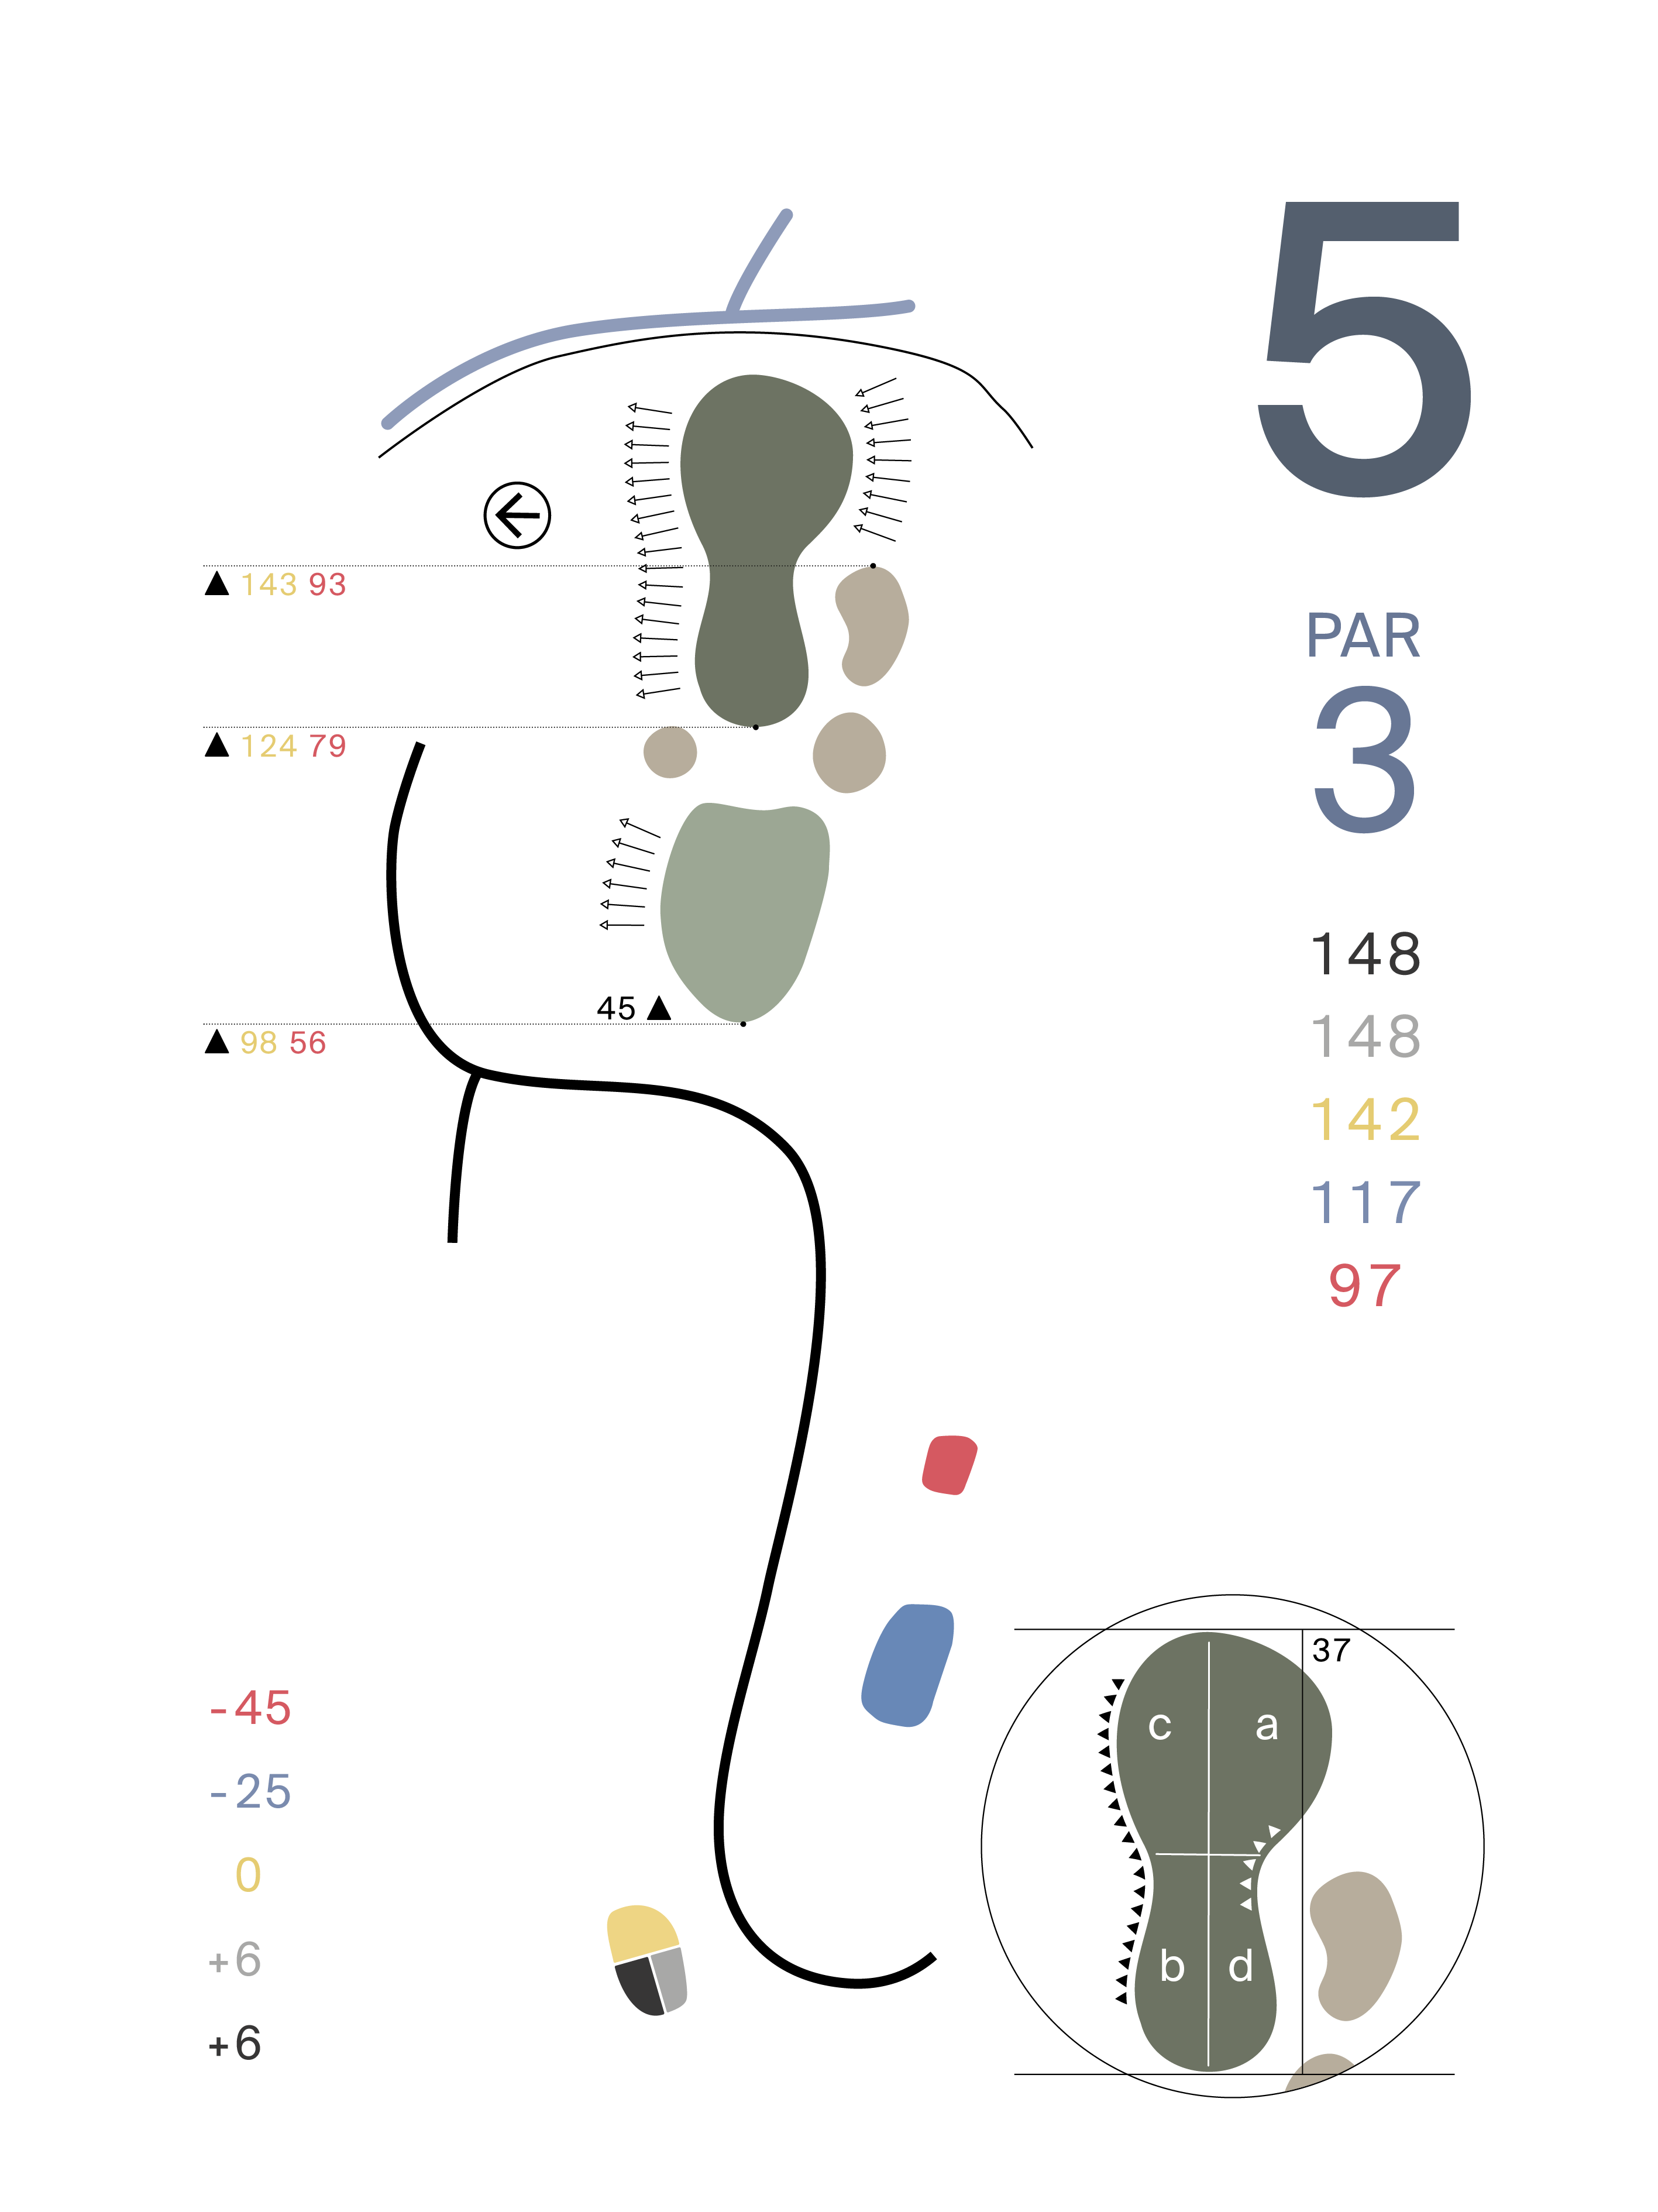
Hole 5
PAR 3
The safe play is to hit the right side of the green. A high soft shot will make it easier to keep it on this elevated green.
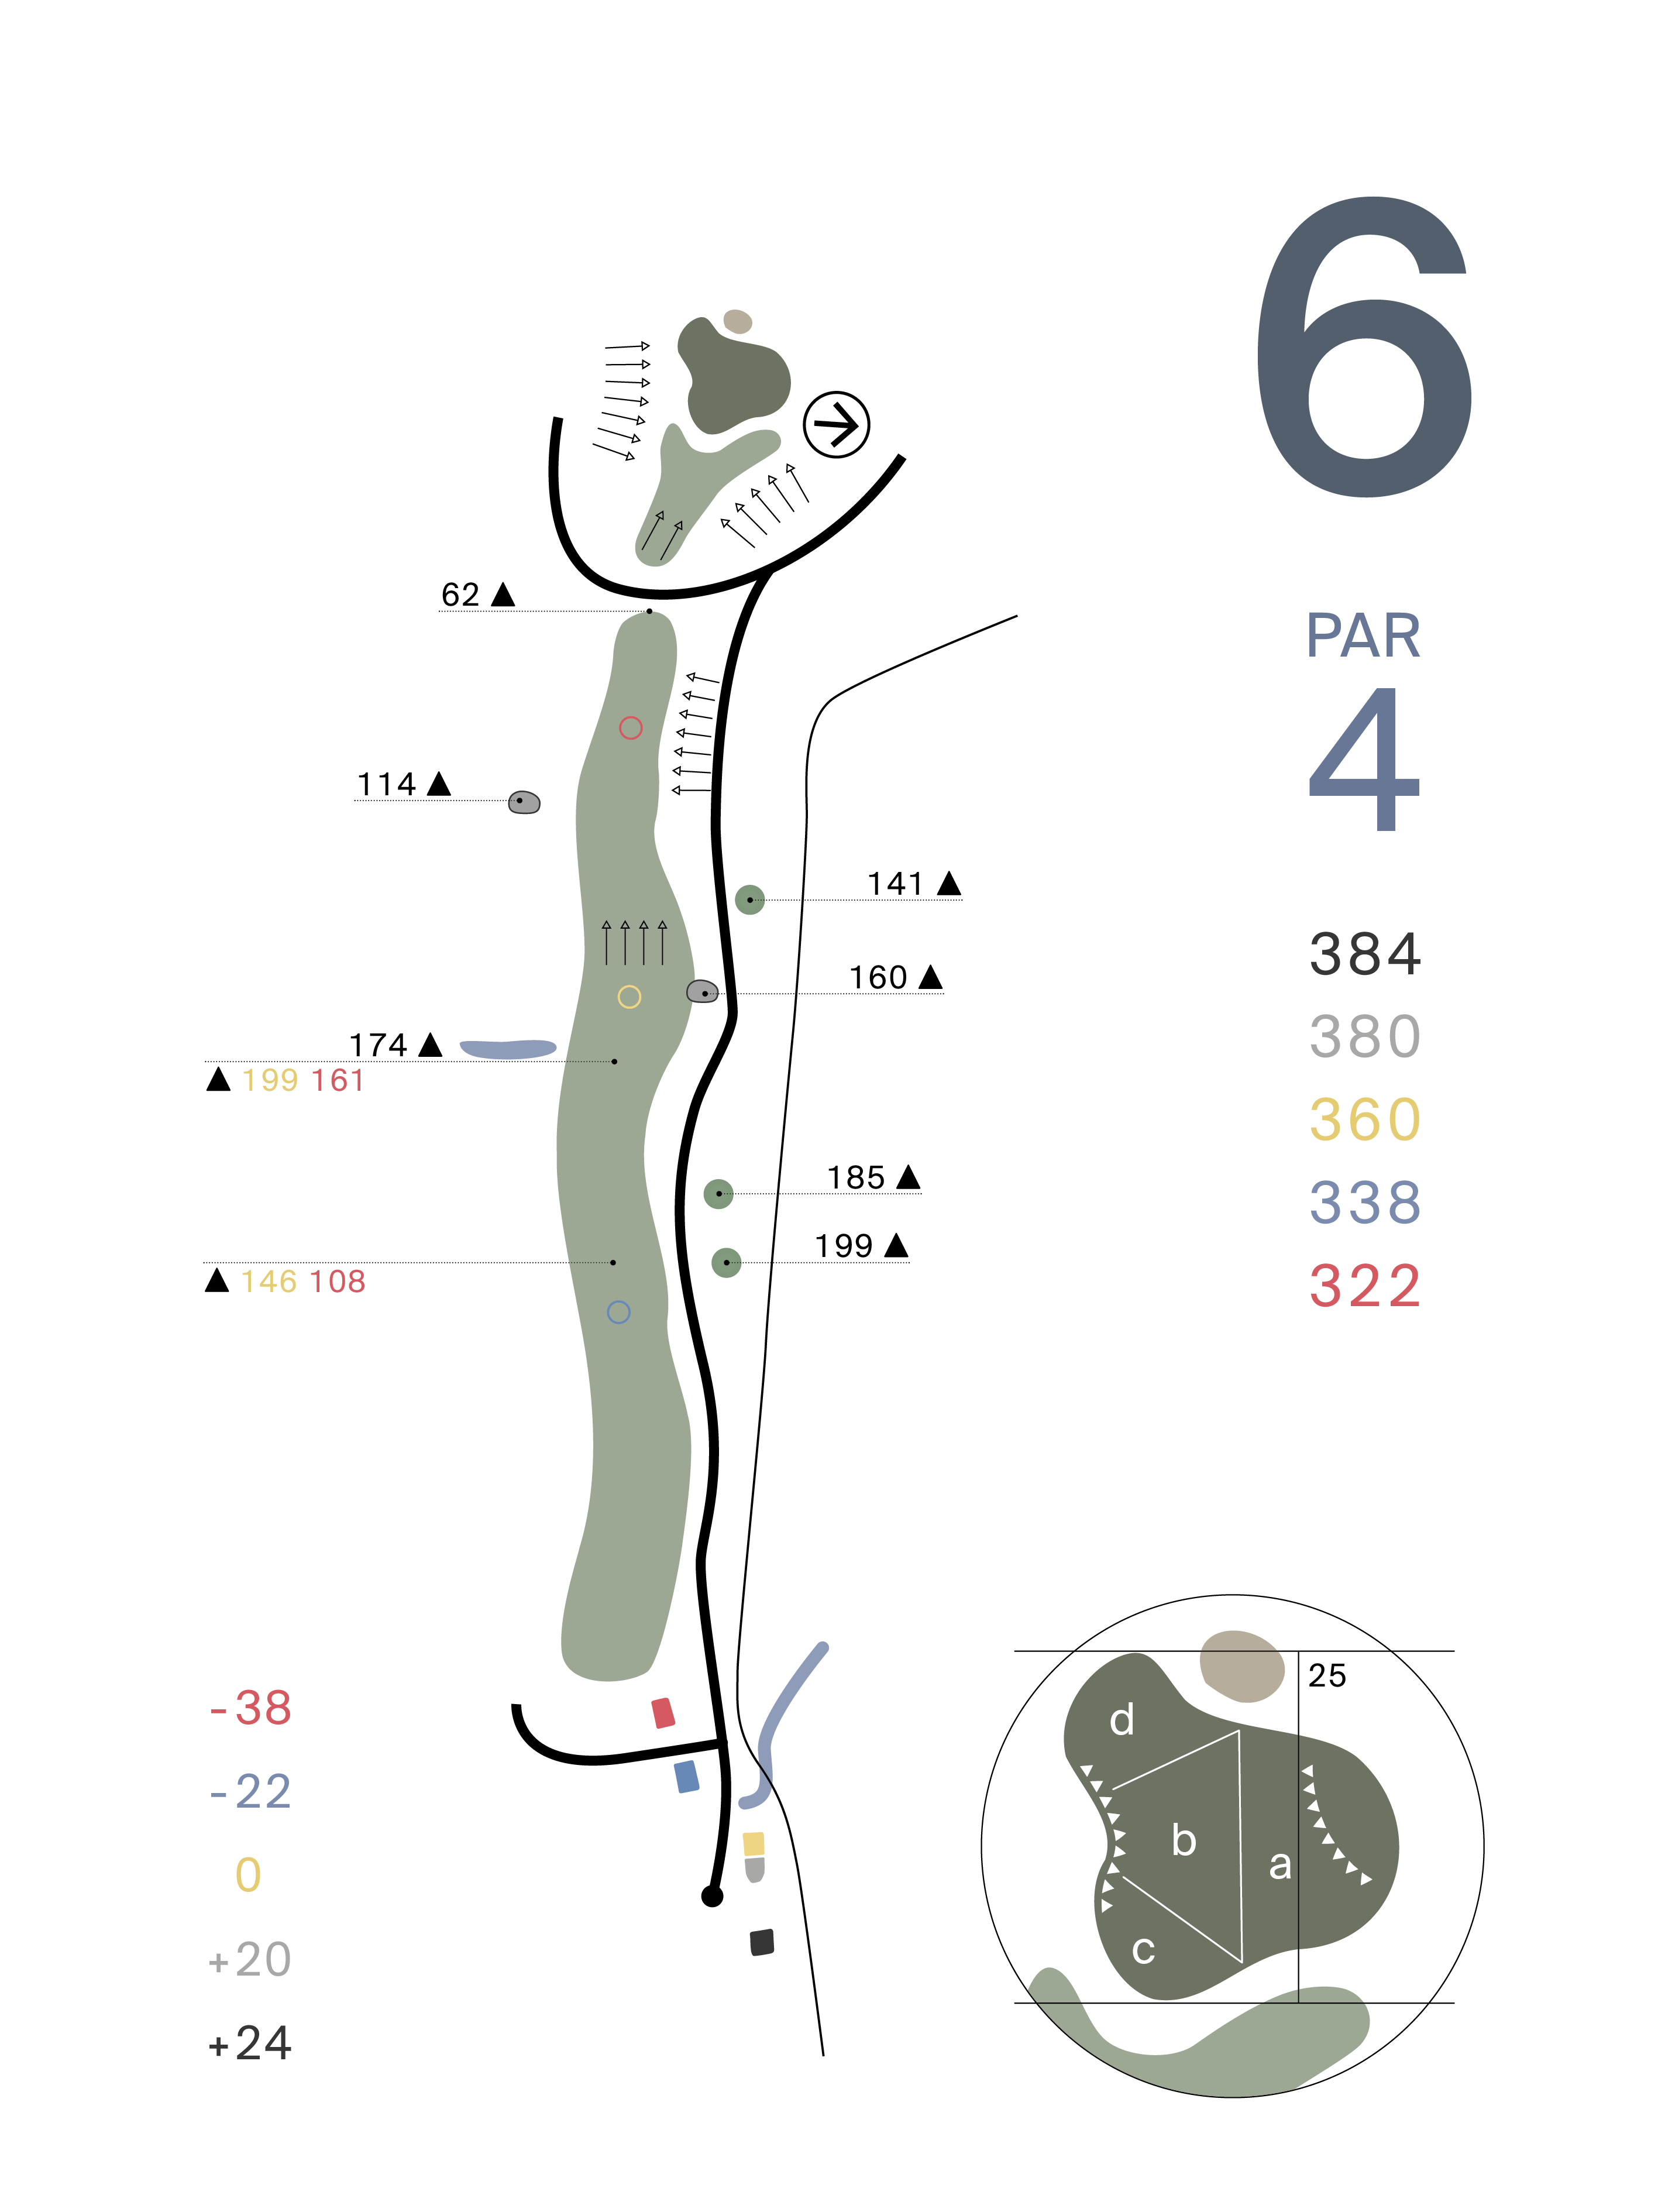
Hole 6
PAR 4
Aim down the left side of fairway for a better look at the green. The front of the green is open and inviting to run the ball in.
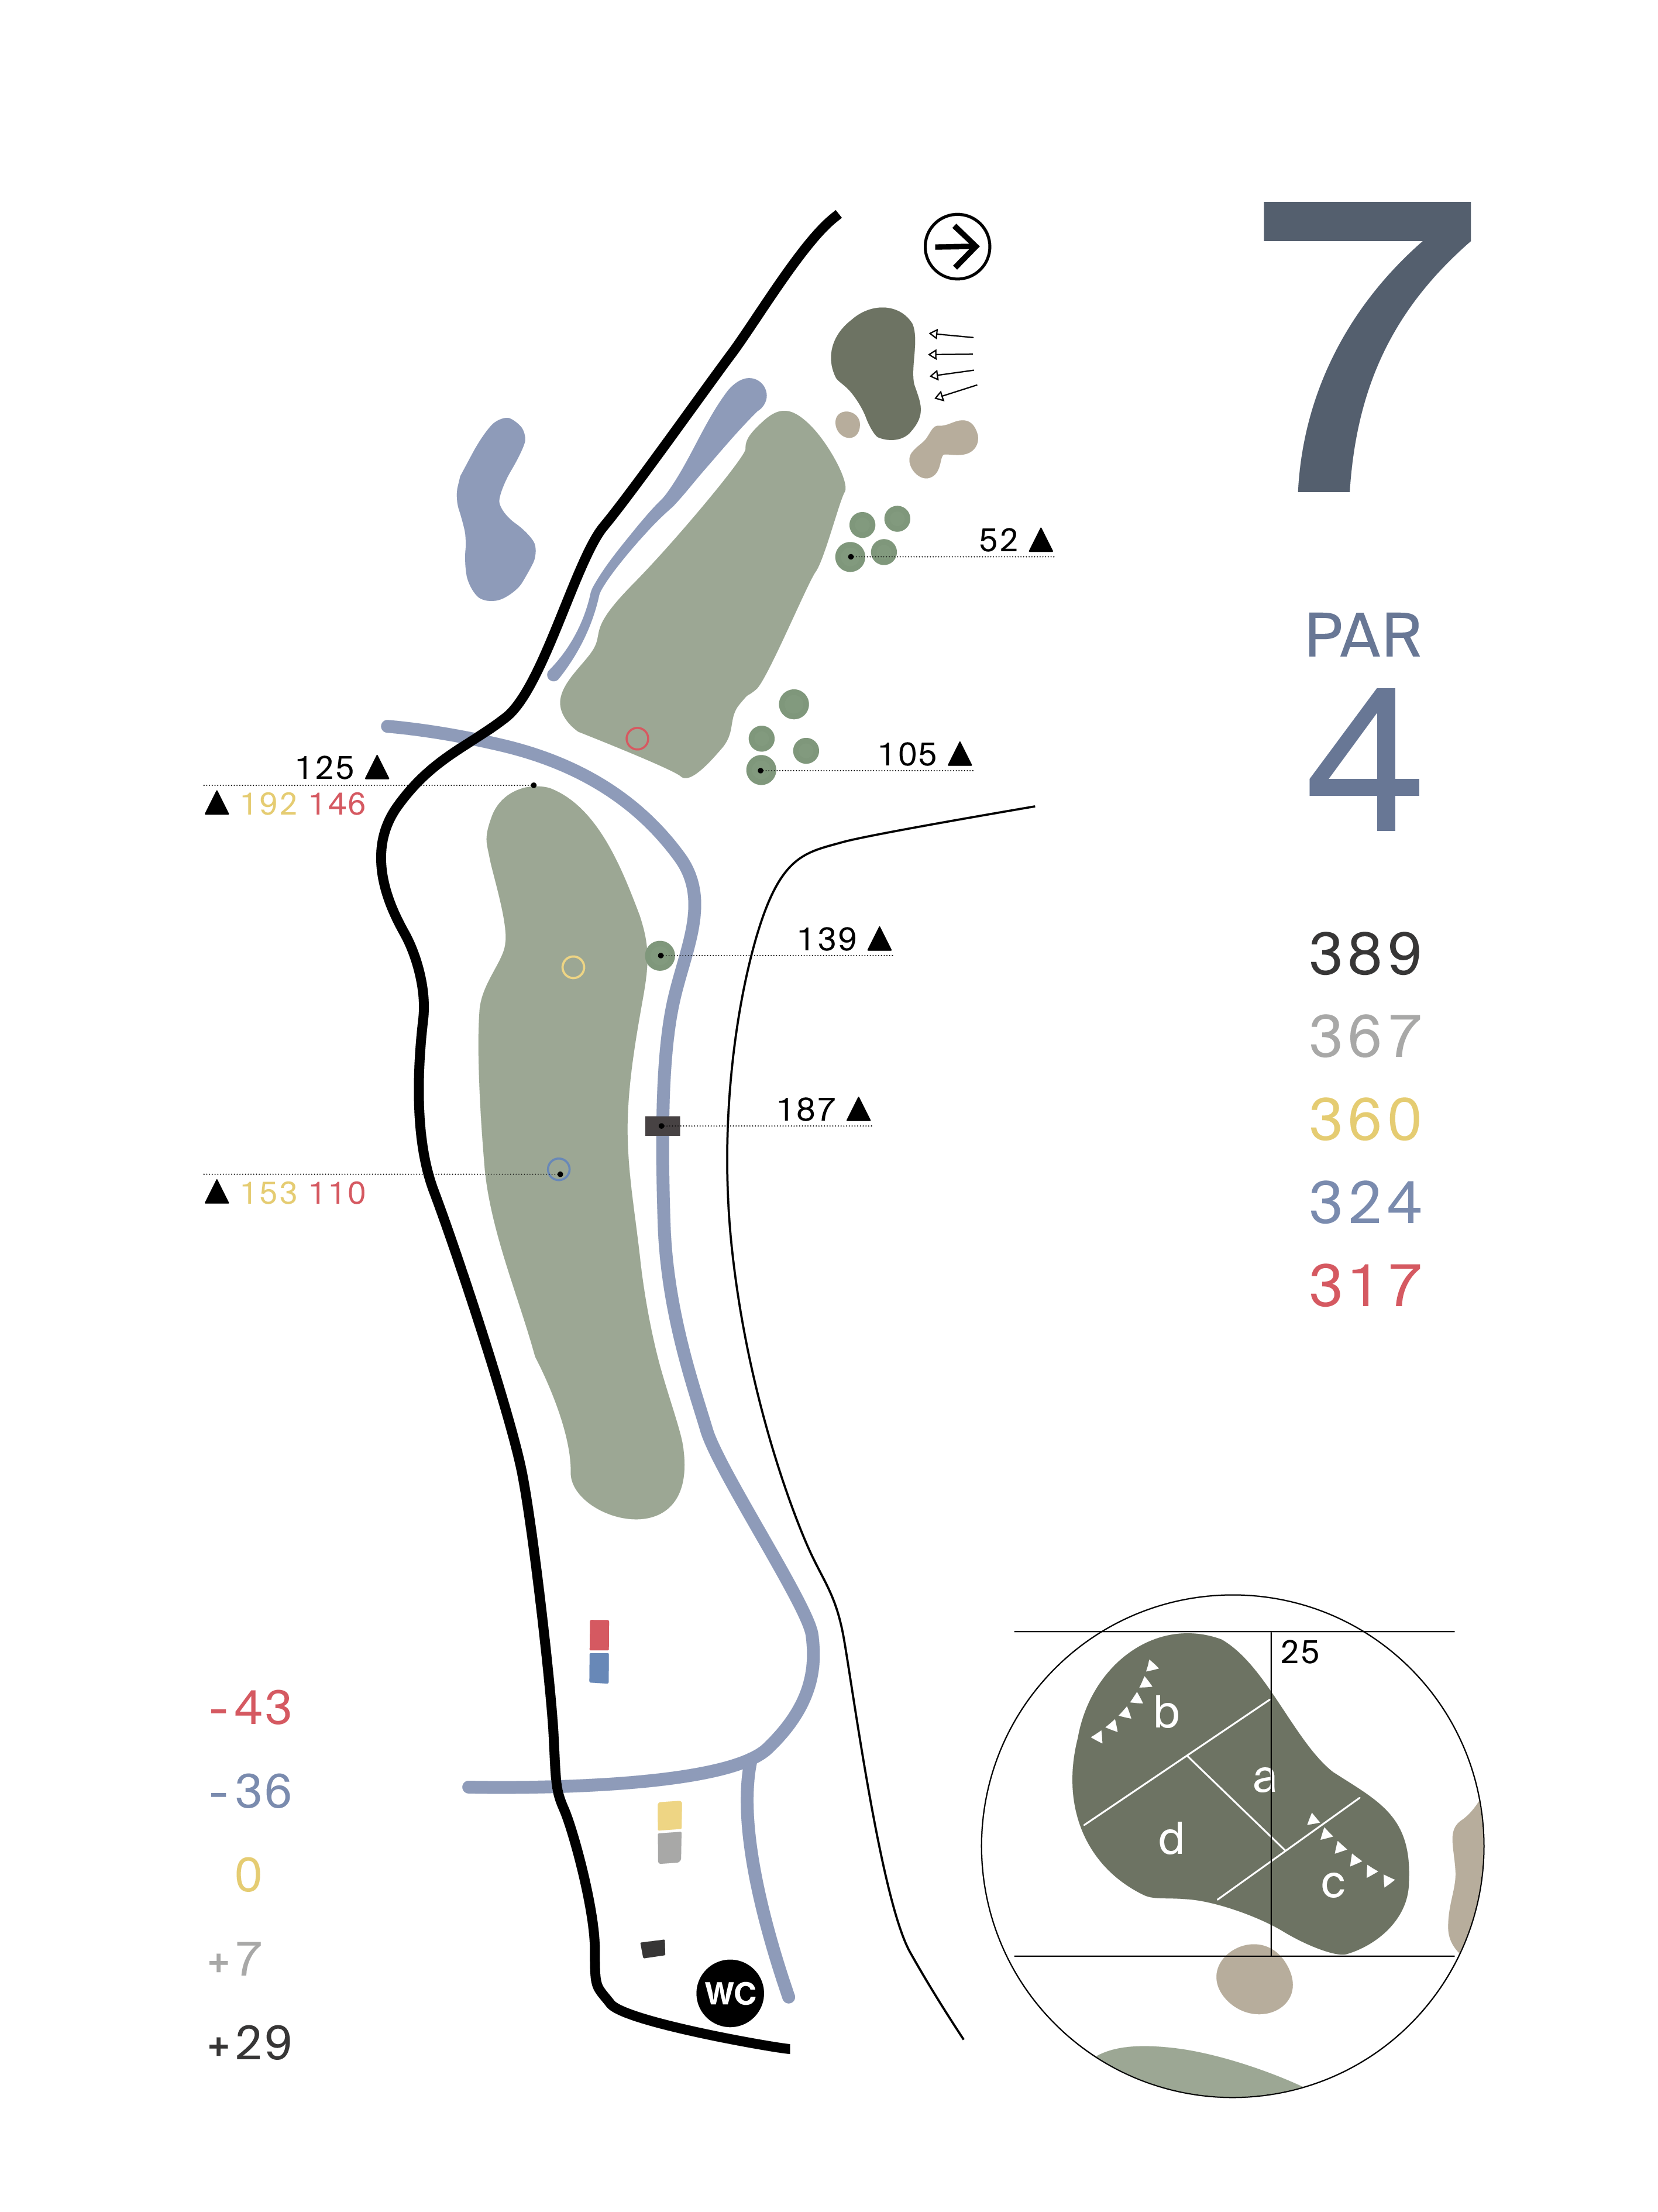
Hole 7
PAR 4
The safe shot is to keep left off the tee. Even though it makes the hole play longer it puts you in a good position to attack the green.

Hole 8
PAR 5
The left fairway bunker is the ideal line from the tee. A precise approach is needed to this narrow, well protected green. Consider the pin position, the green is very long.

Hole 9
PAR 3
It takes a very precise shot to hit this green. There is no easy bail out area but left is better. Option to use the dropping zone if needed.
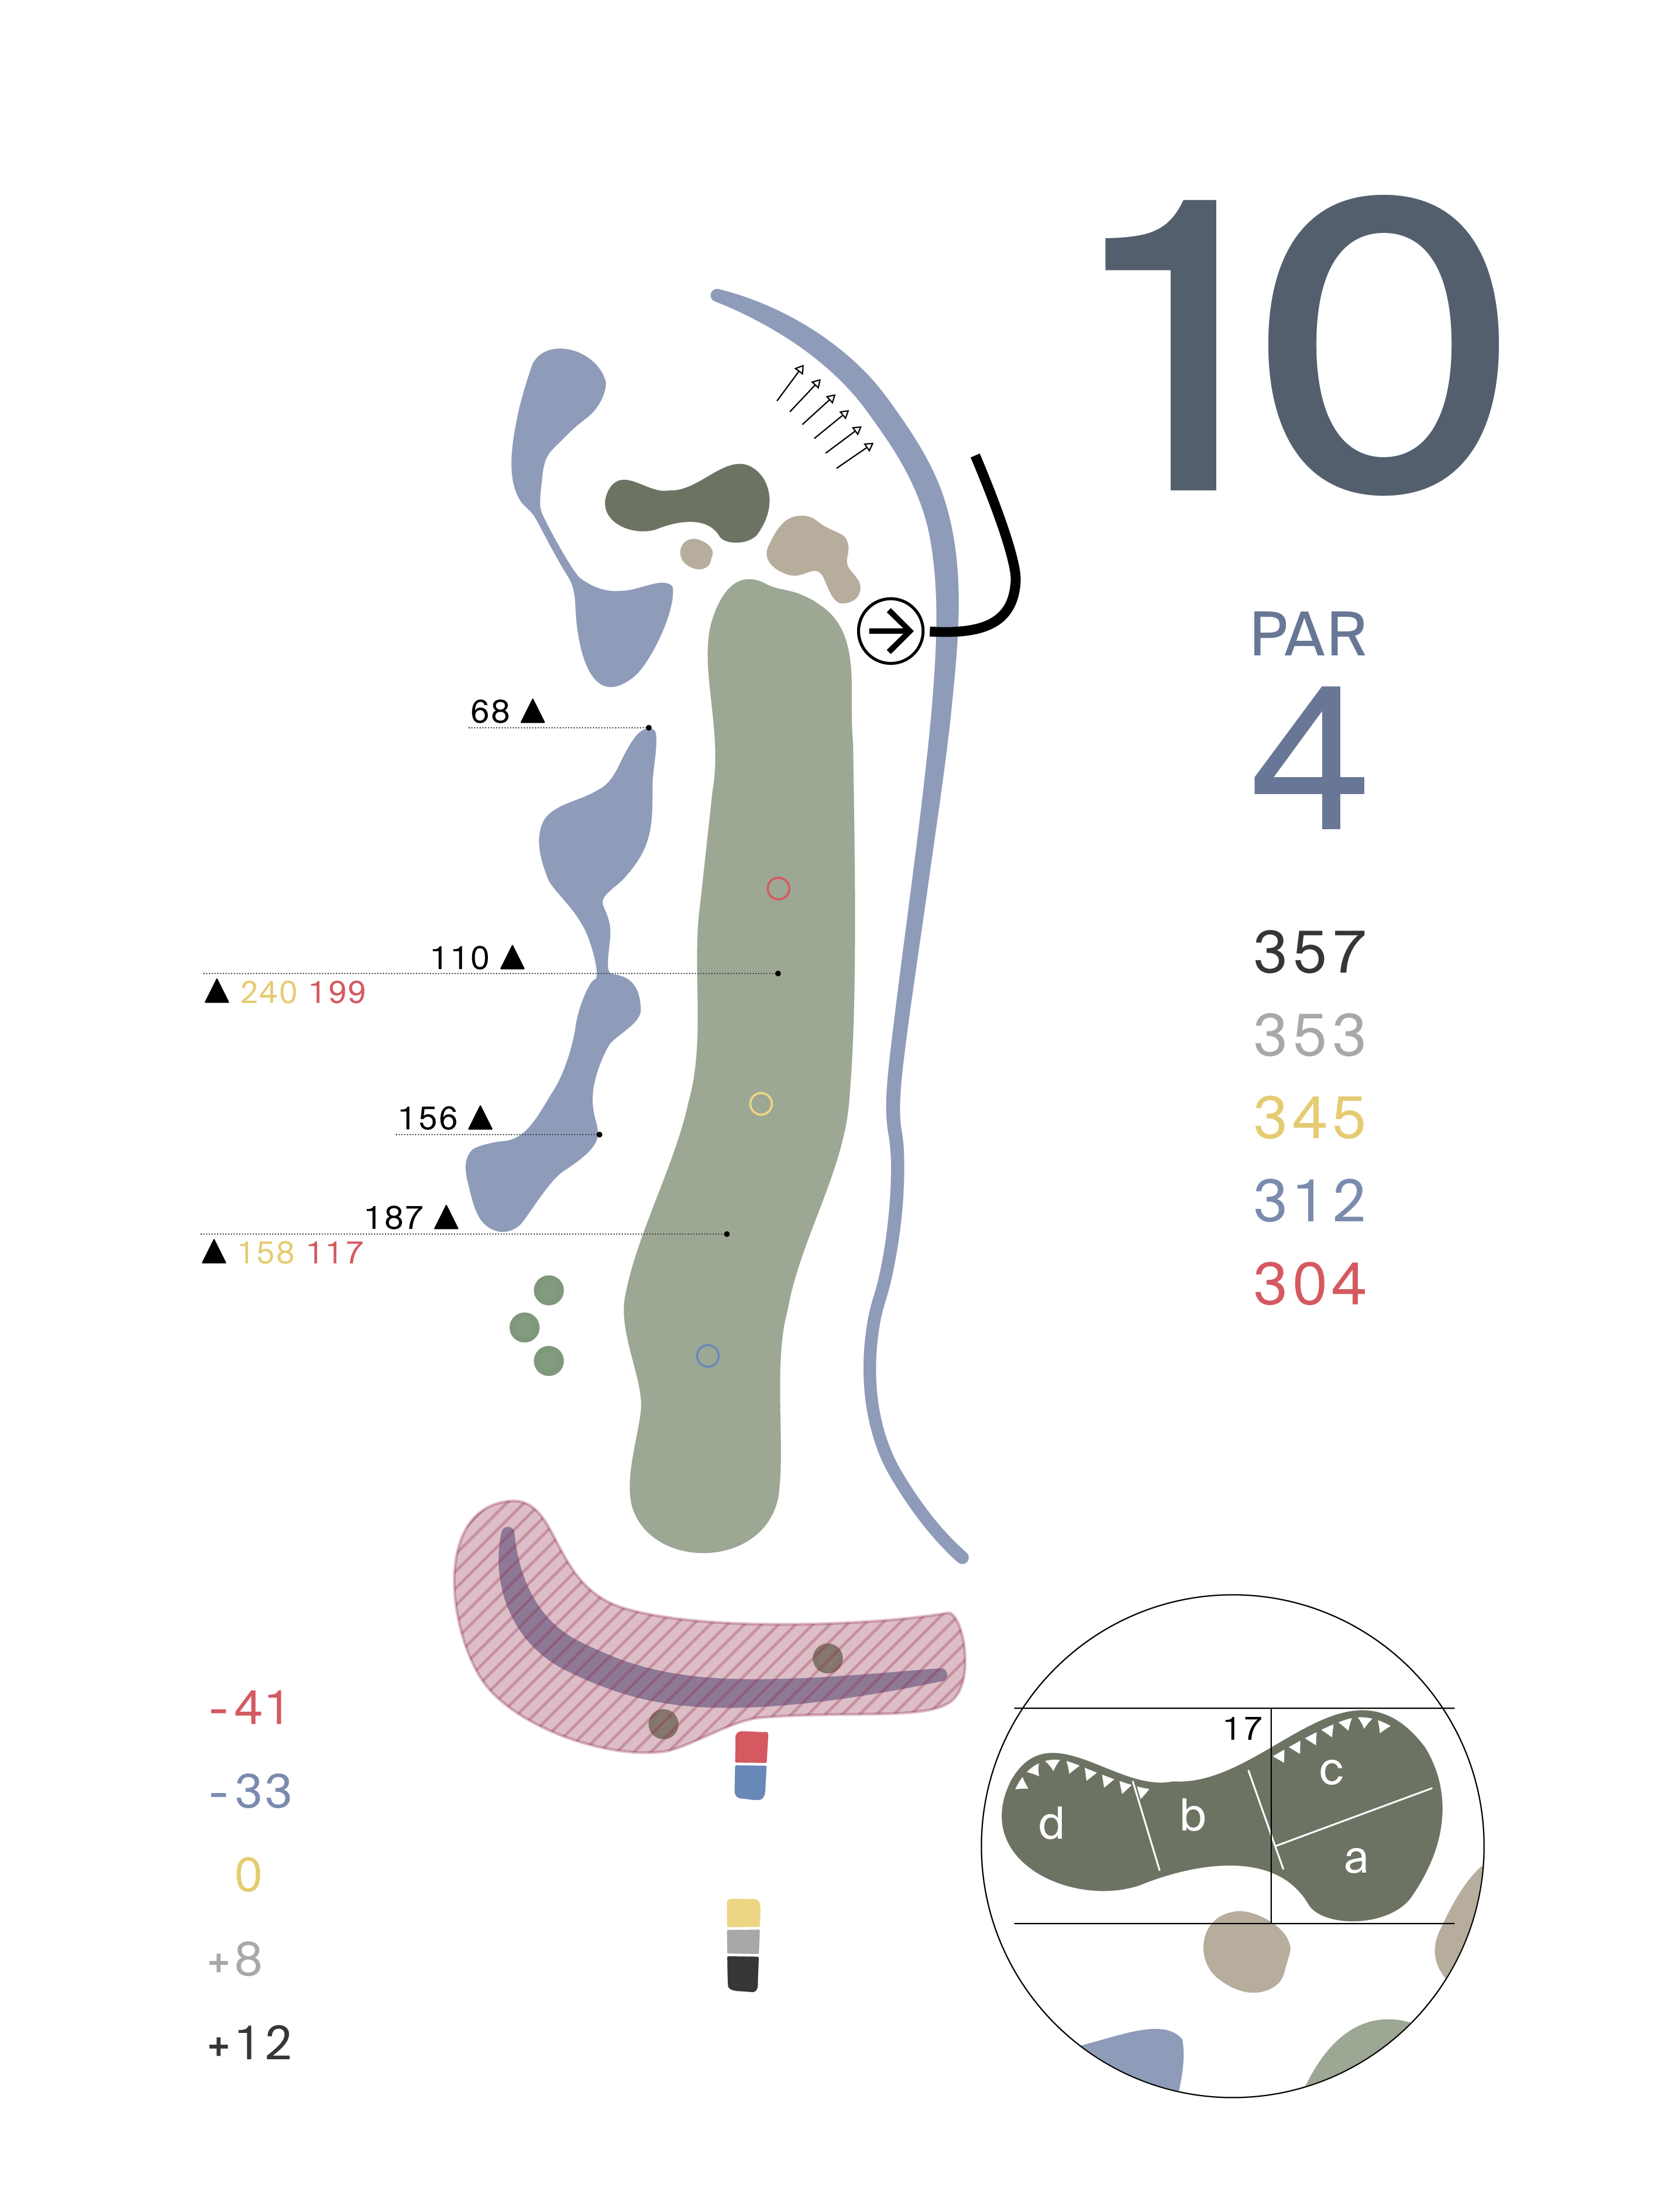
Hole 10
PAR 4
Target the middle of the fairway on this short par 4. Precise club selection on approach is needed as the green is short in depth.
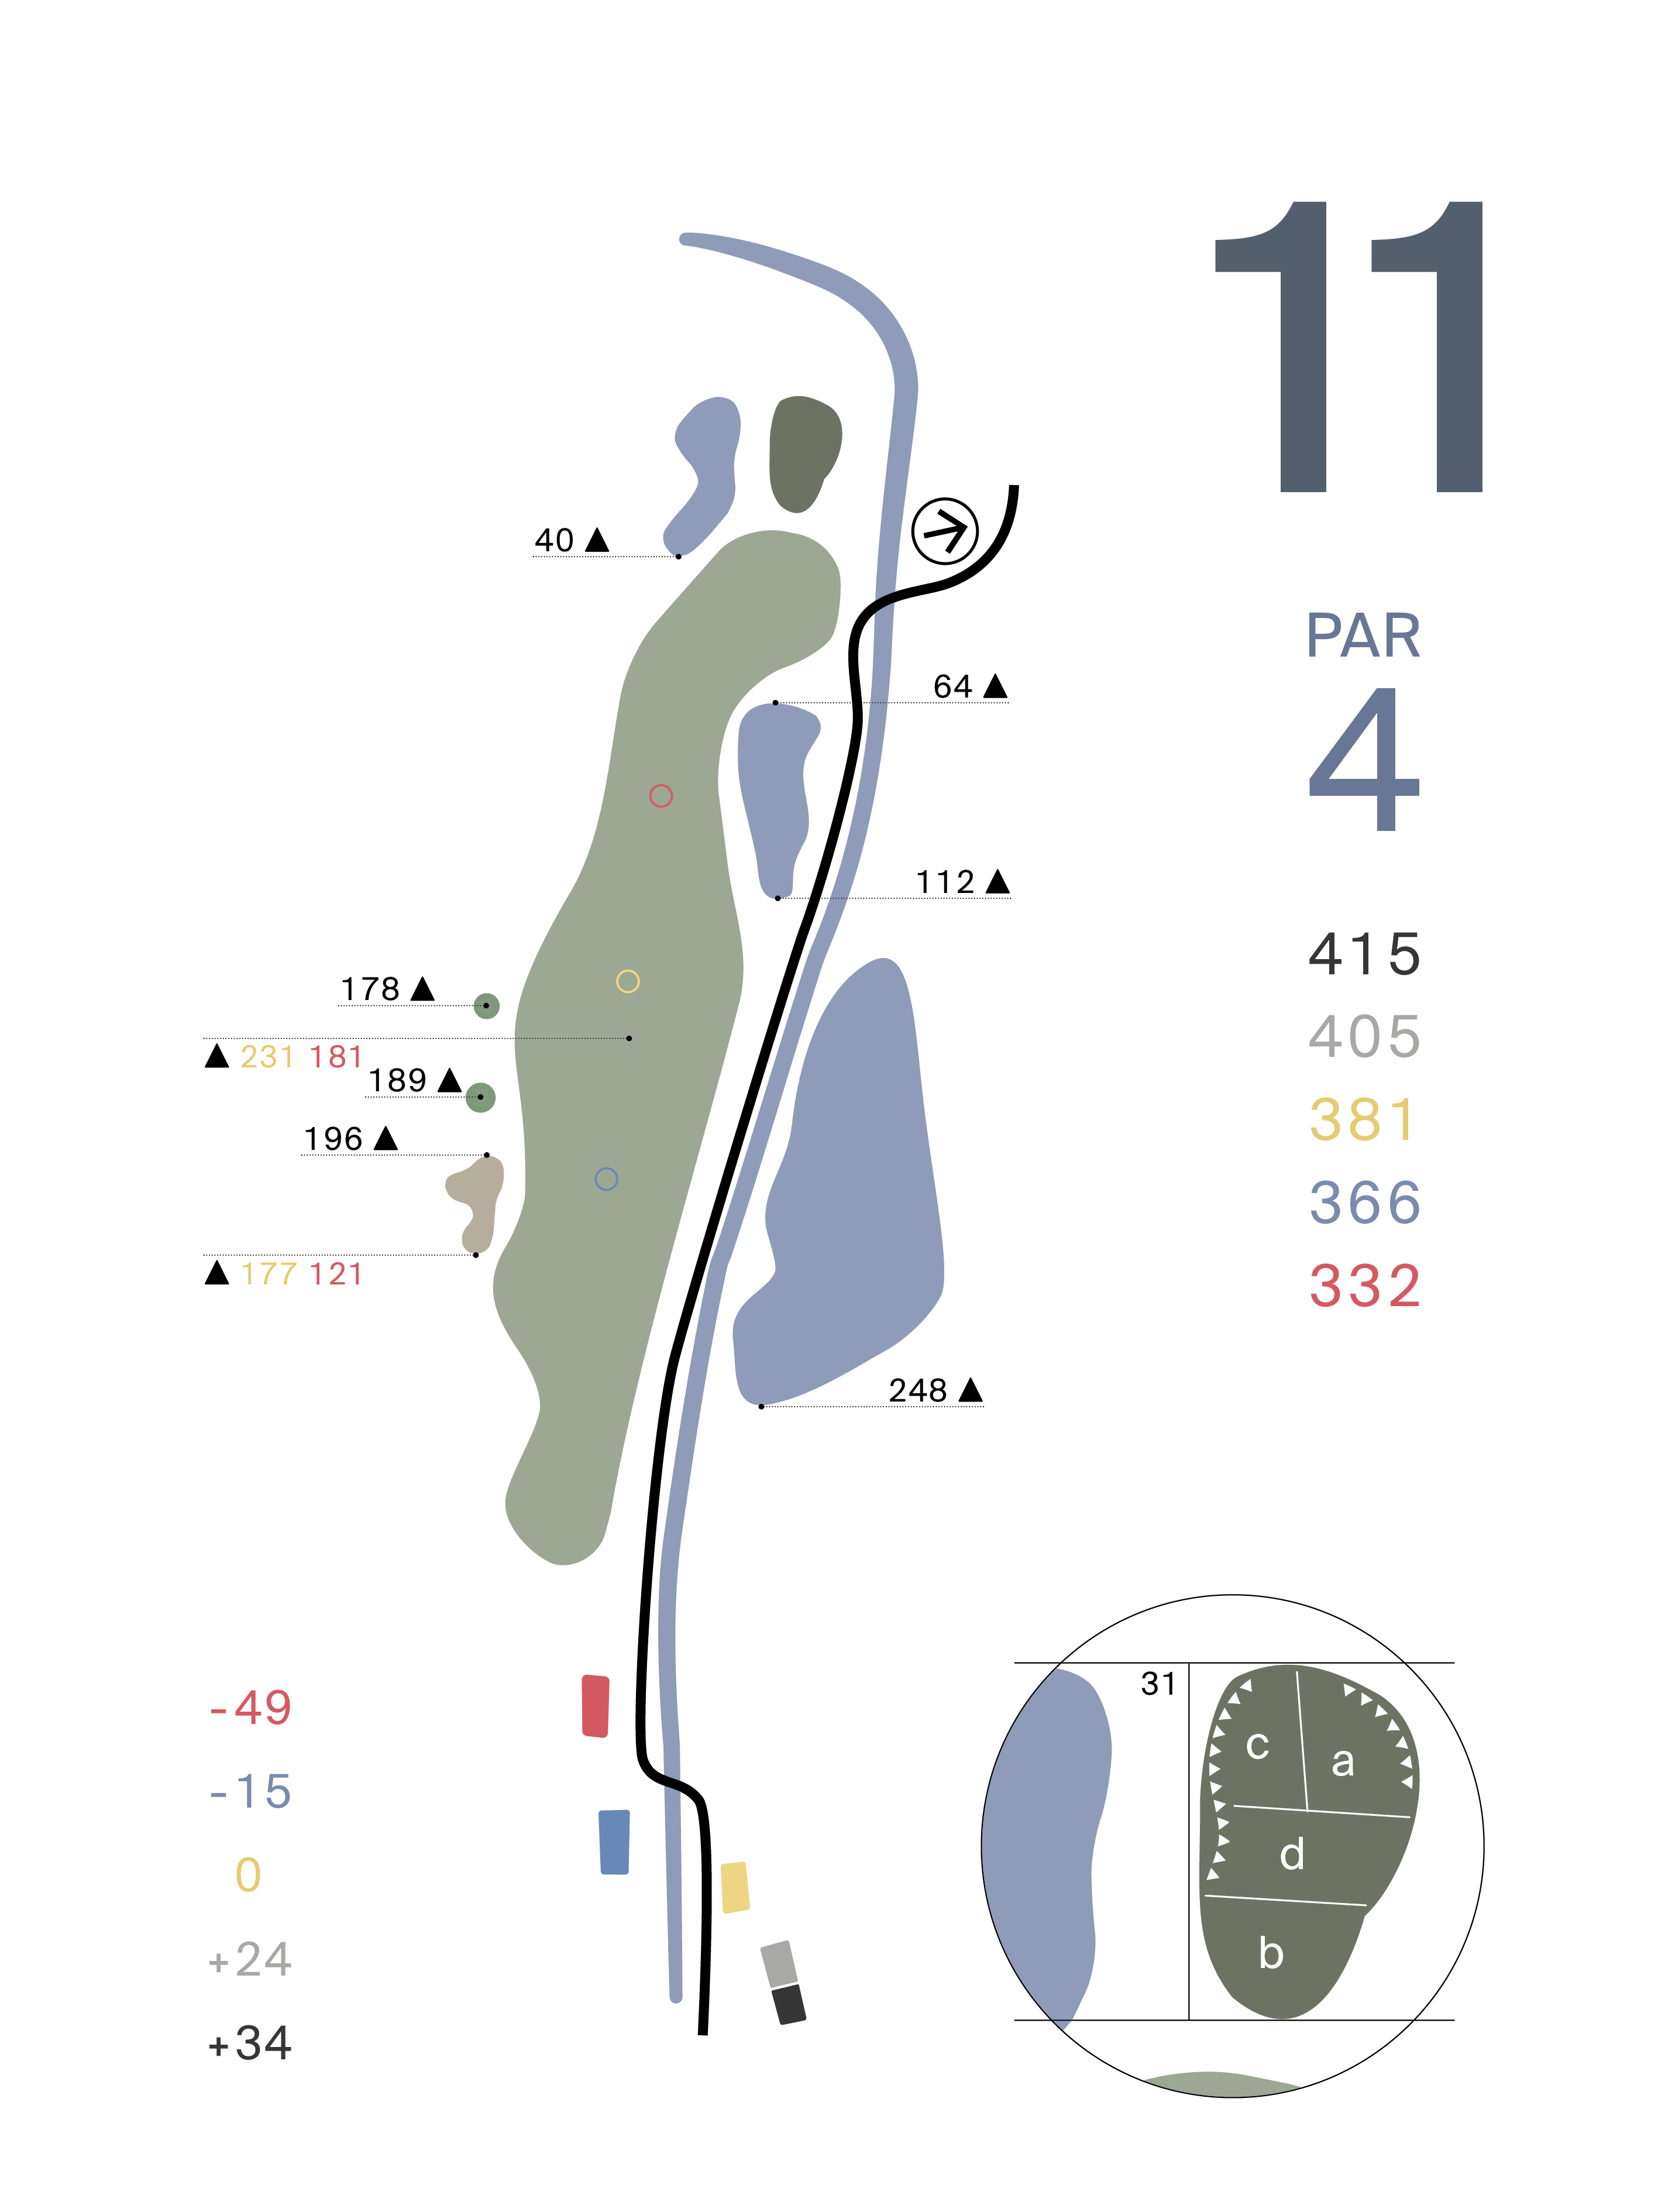
Hole 11
PAR 4
An aggressive line over the corner of the water shortens this long par 4 considerably but check the carry. For the approach favour the right side of the green.
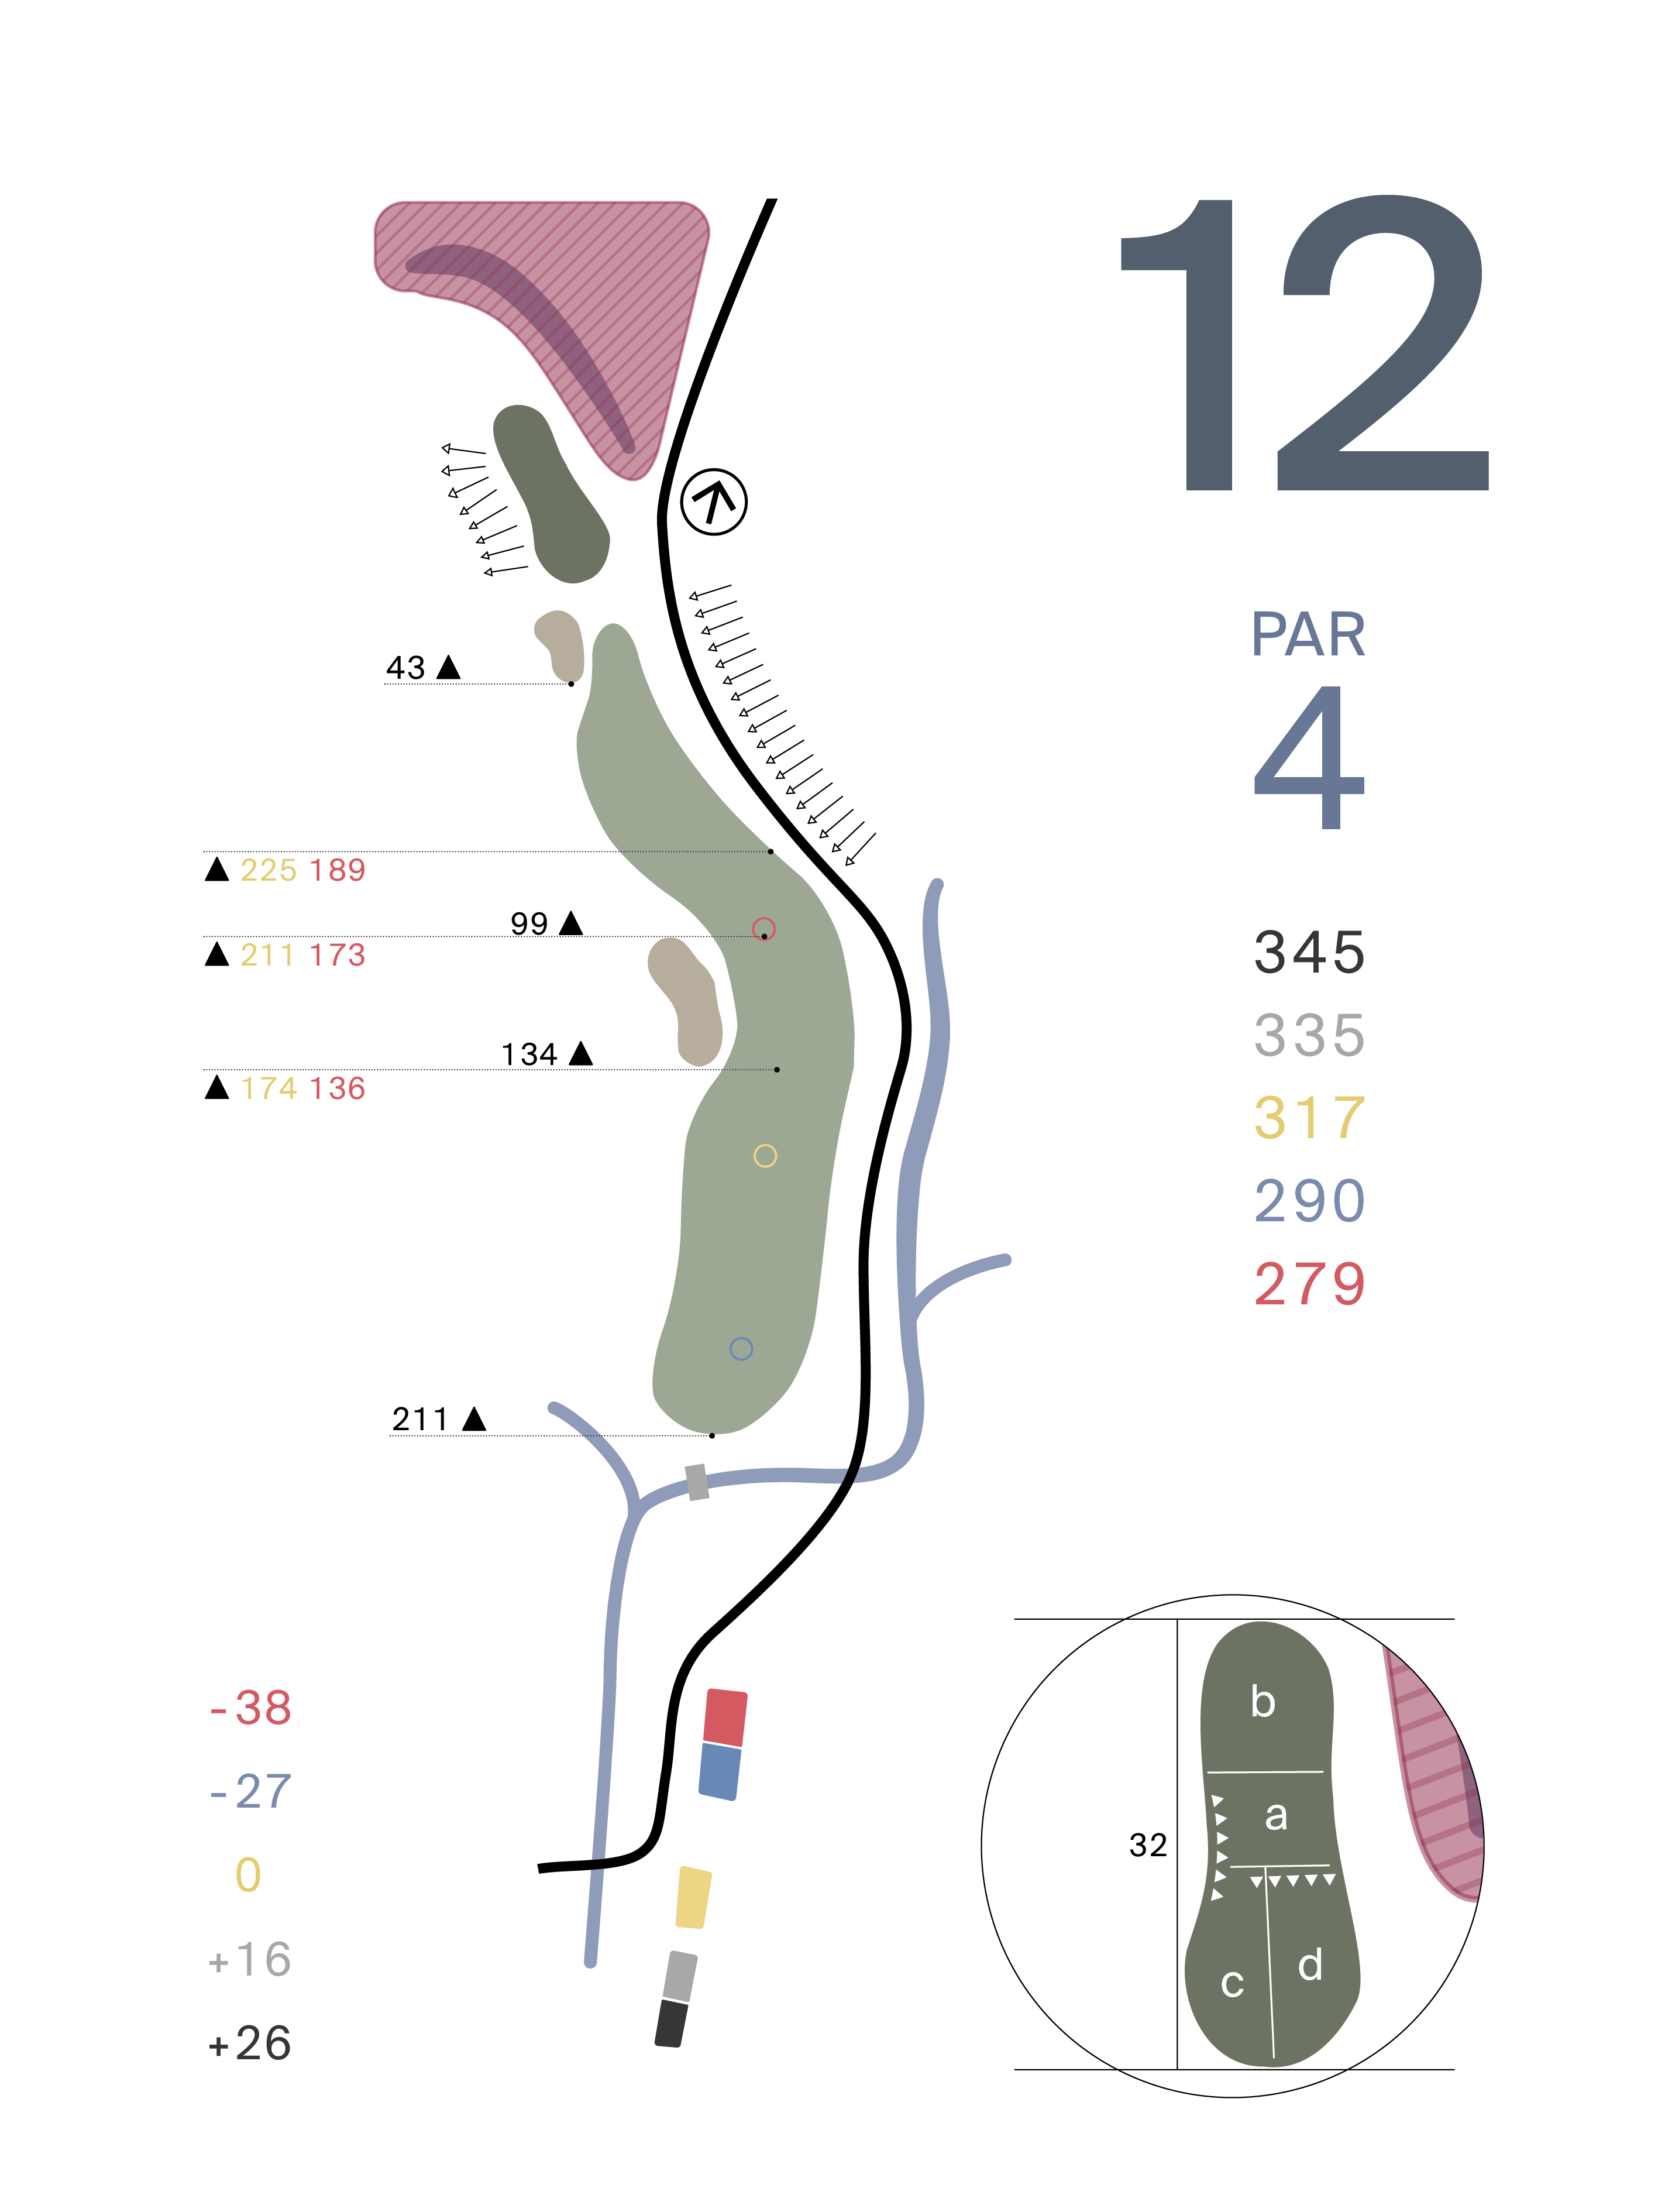
Hole 12
PAR 4
For an easy approach hit the drive just right of the bunker, from here you will have the best view of this long, narrow green. Too short and you have the green side bunker to carry and a long blind shot over a hill.
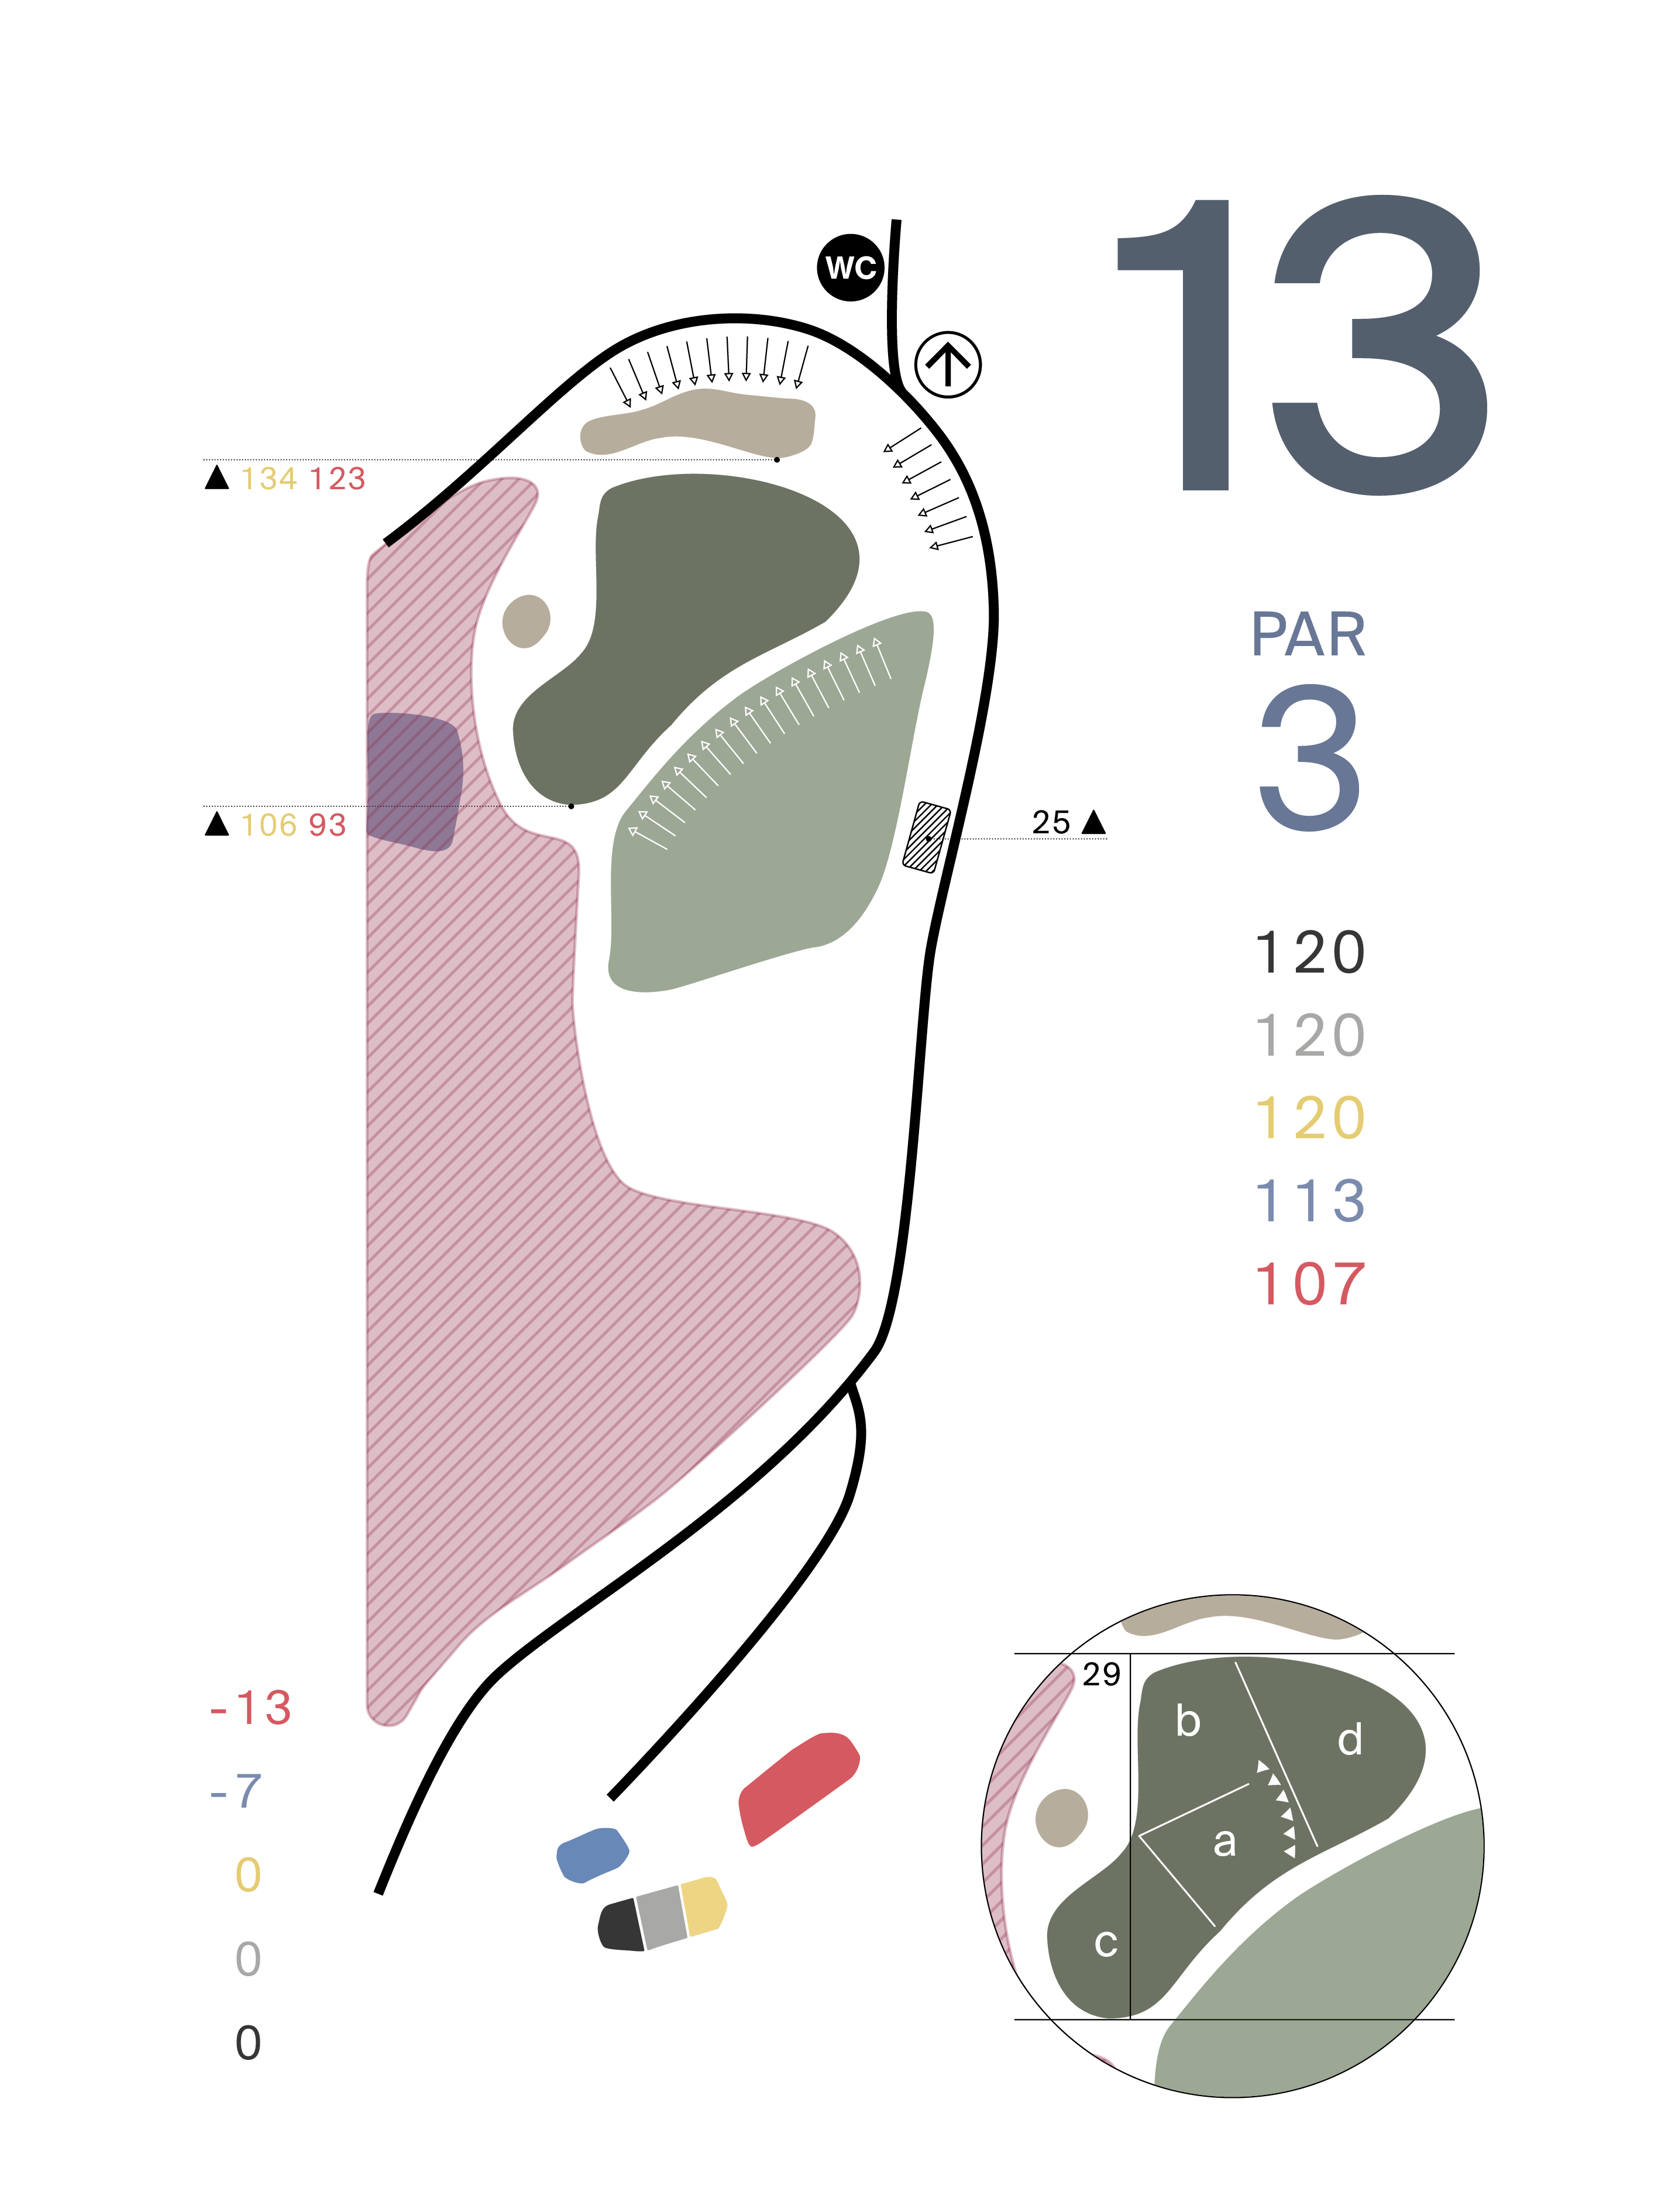
Hole 13
PAR 3
Take one club length less for elevation drop, but also consider the wind direction from this exposed tee. Use option of dropping zone if needed.

Hole 14
PAR 5
Enjoy the elevated tee and let it fly. After the drive keep the ball left to leave a nice approach, or if you can reach aim over the right bunker and run it onto green.
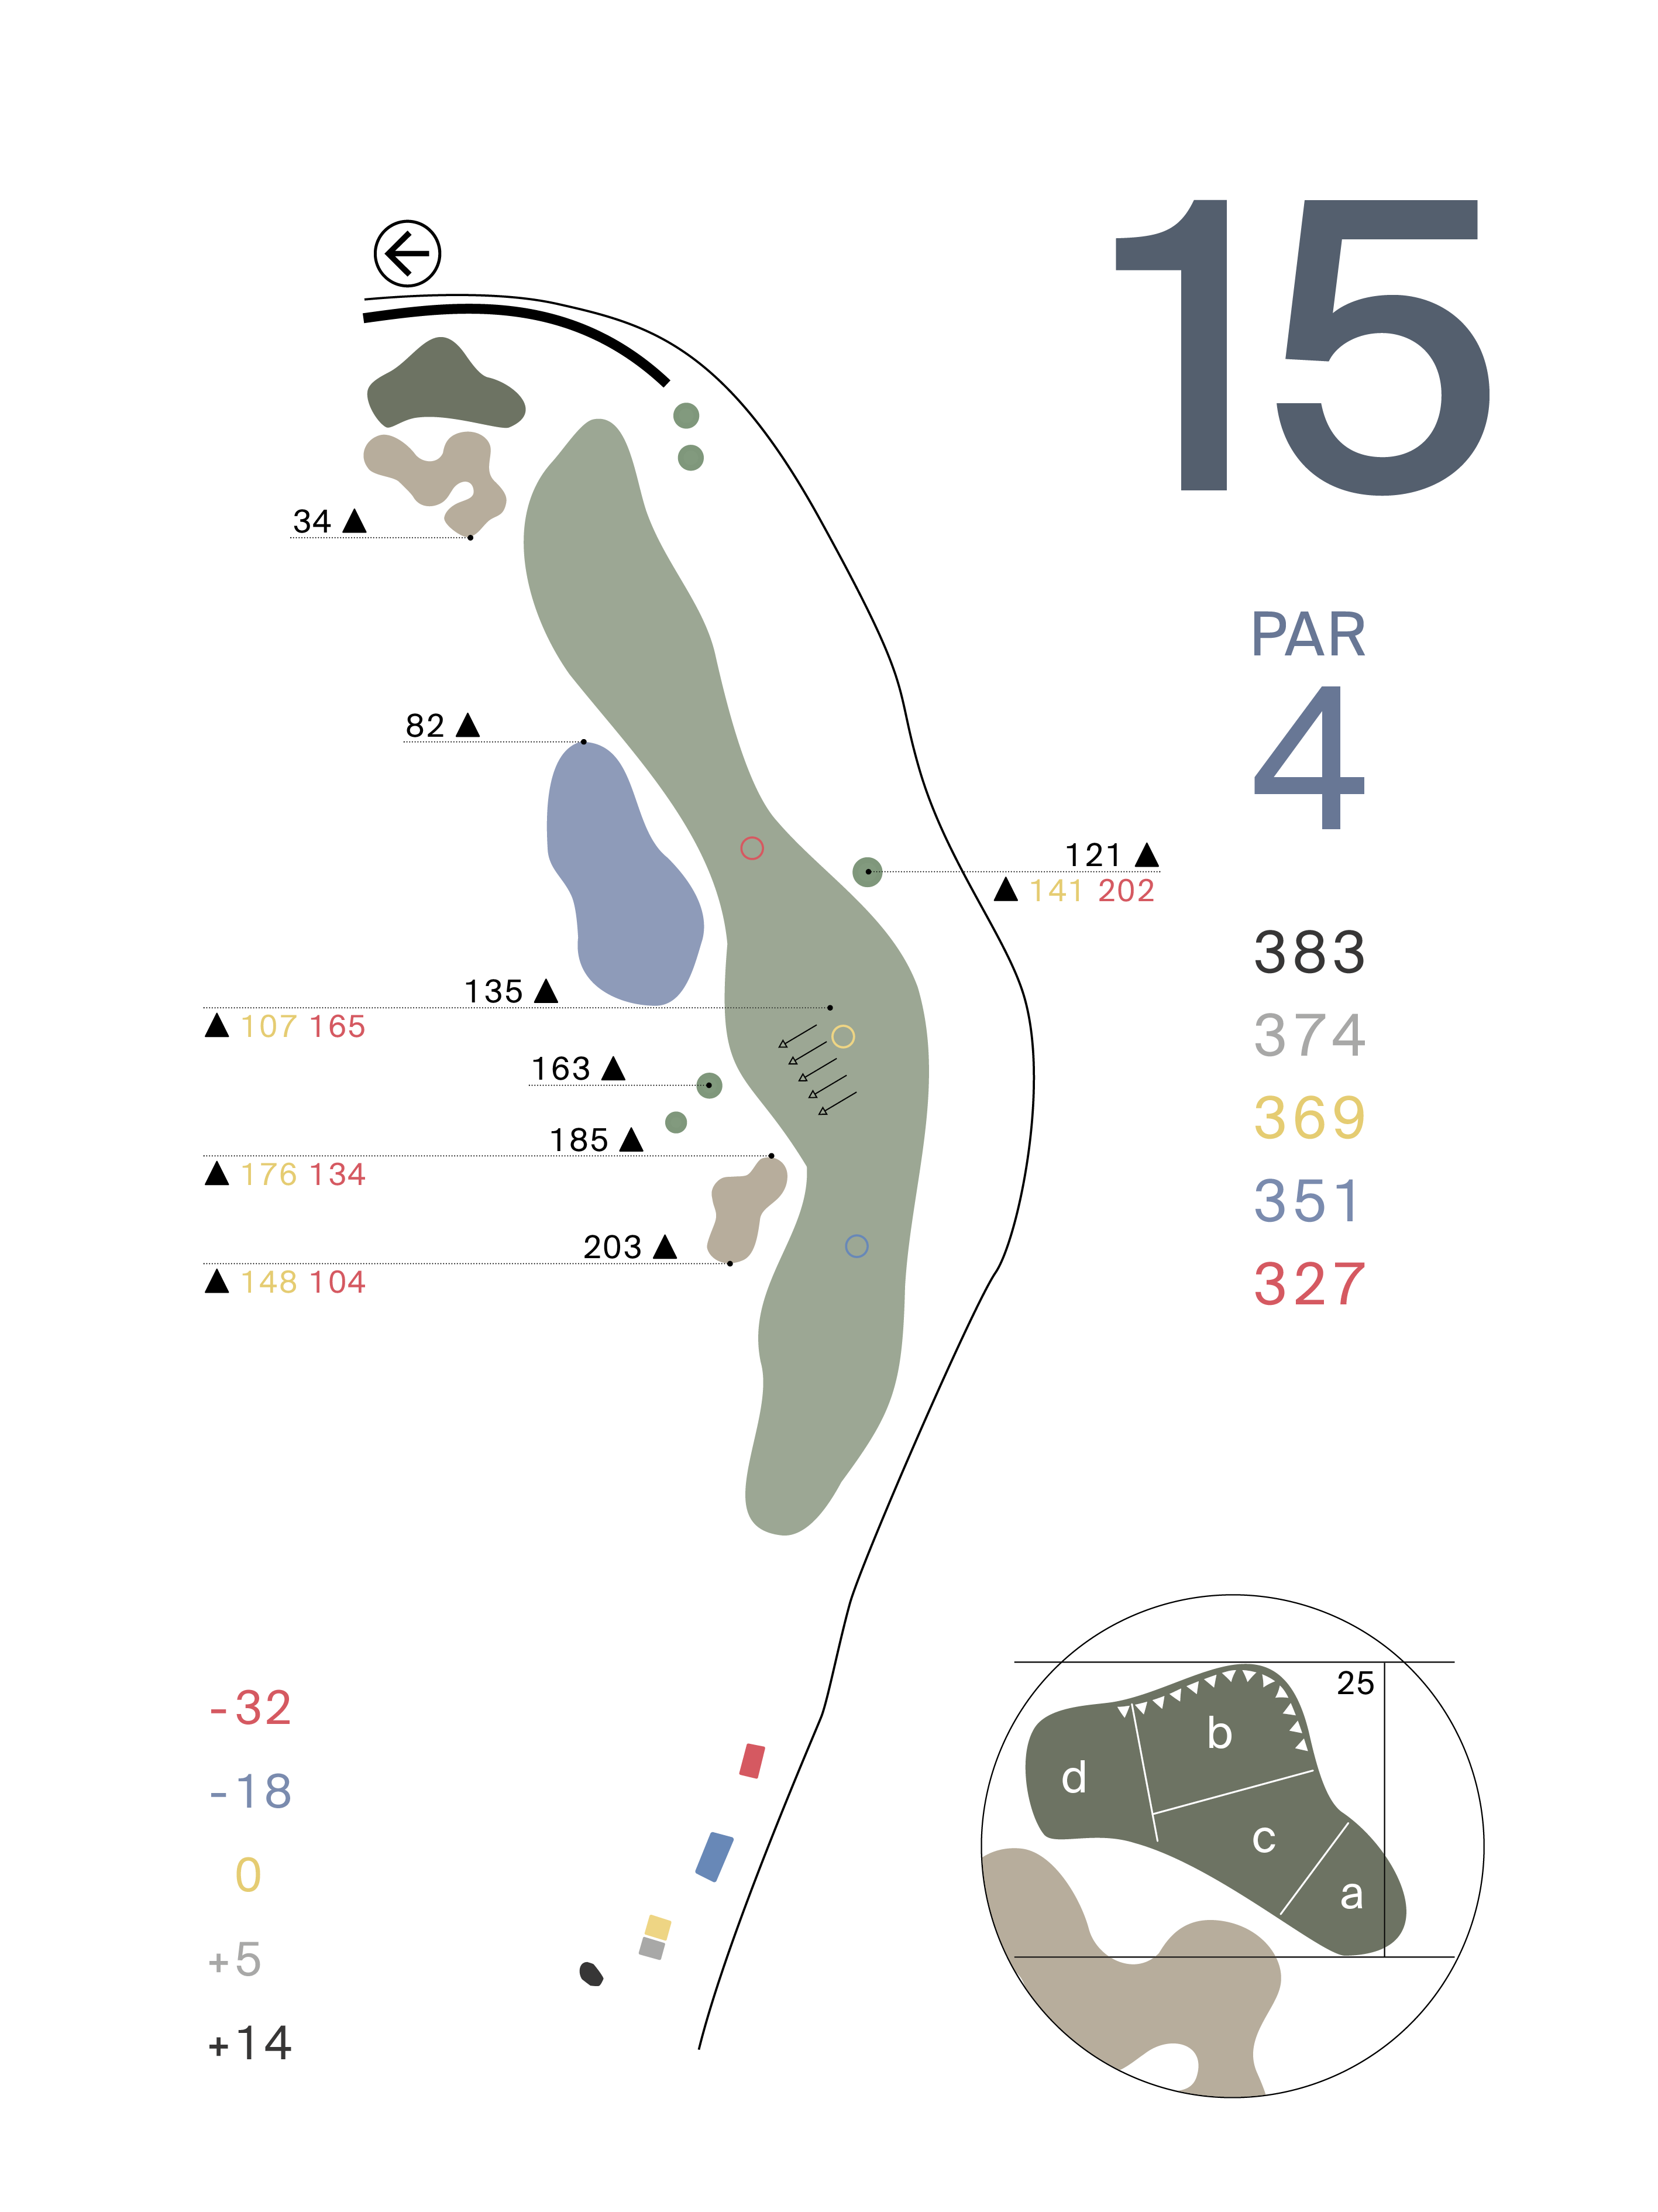
Hole 15
PAR 4
The smart play is to keep right off the tee for a better approach angle. The widest part of the fairway is past the bunker on the right side.
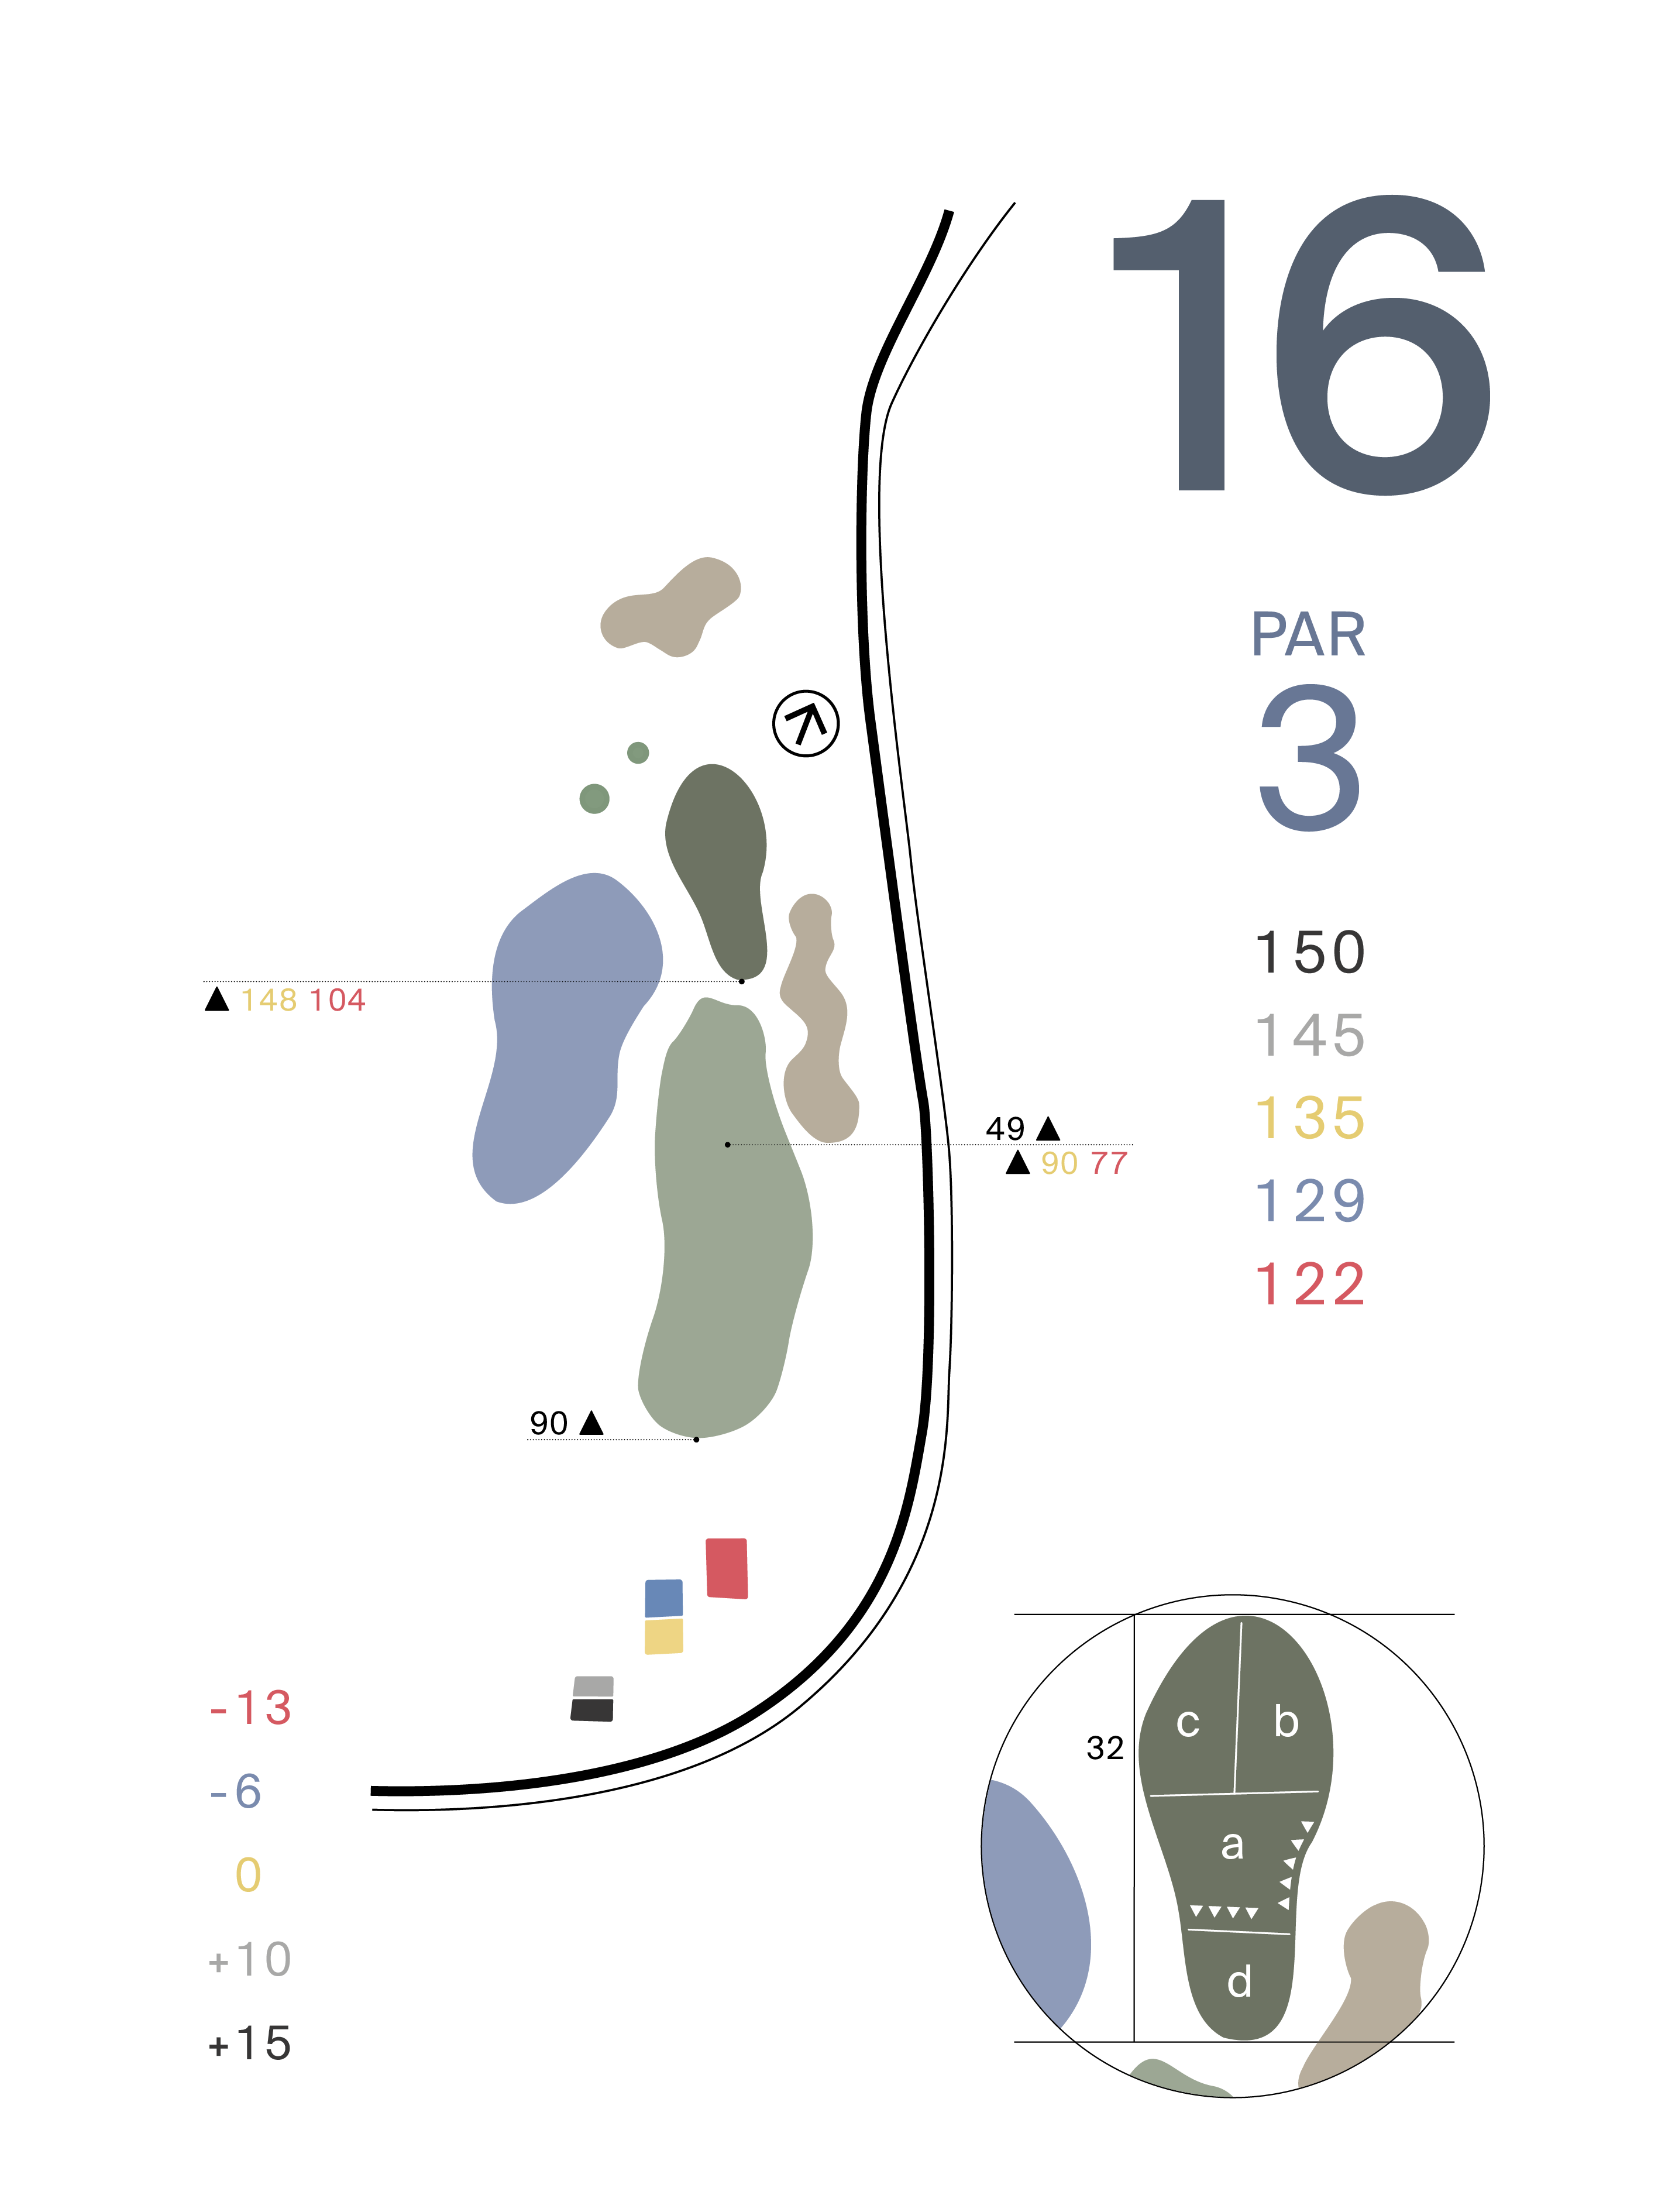
Hole 16
PAR 3
No matter where the pin is just aim for the centre of this well protected green. The widest part of the green is in the back.

Hole 17
PAR 4
A very long Par 4. If out of position or unreachable with the 2nd shot, then lay up short of the water and attack with your 3rd.
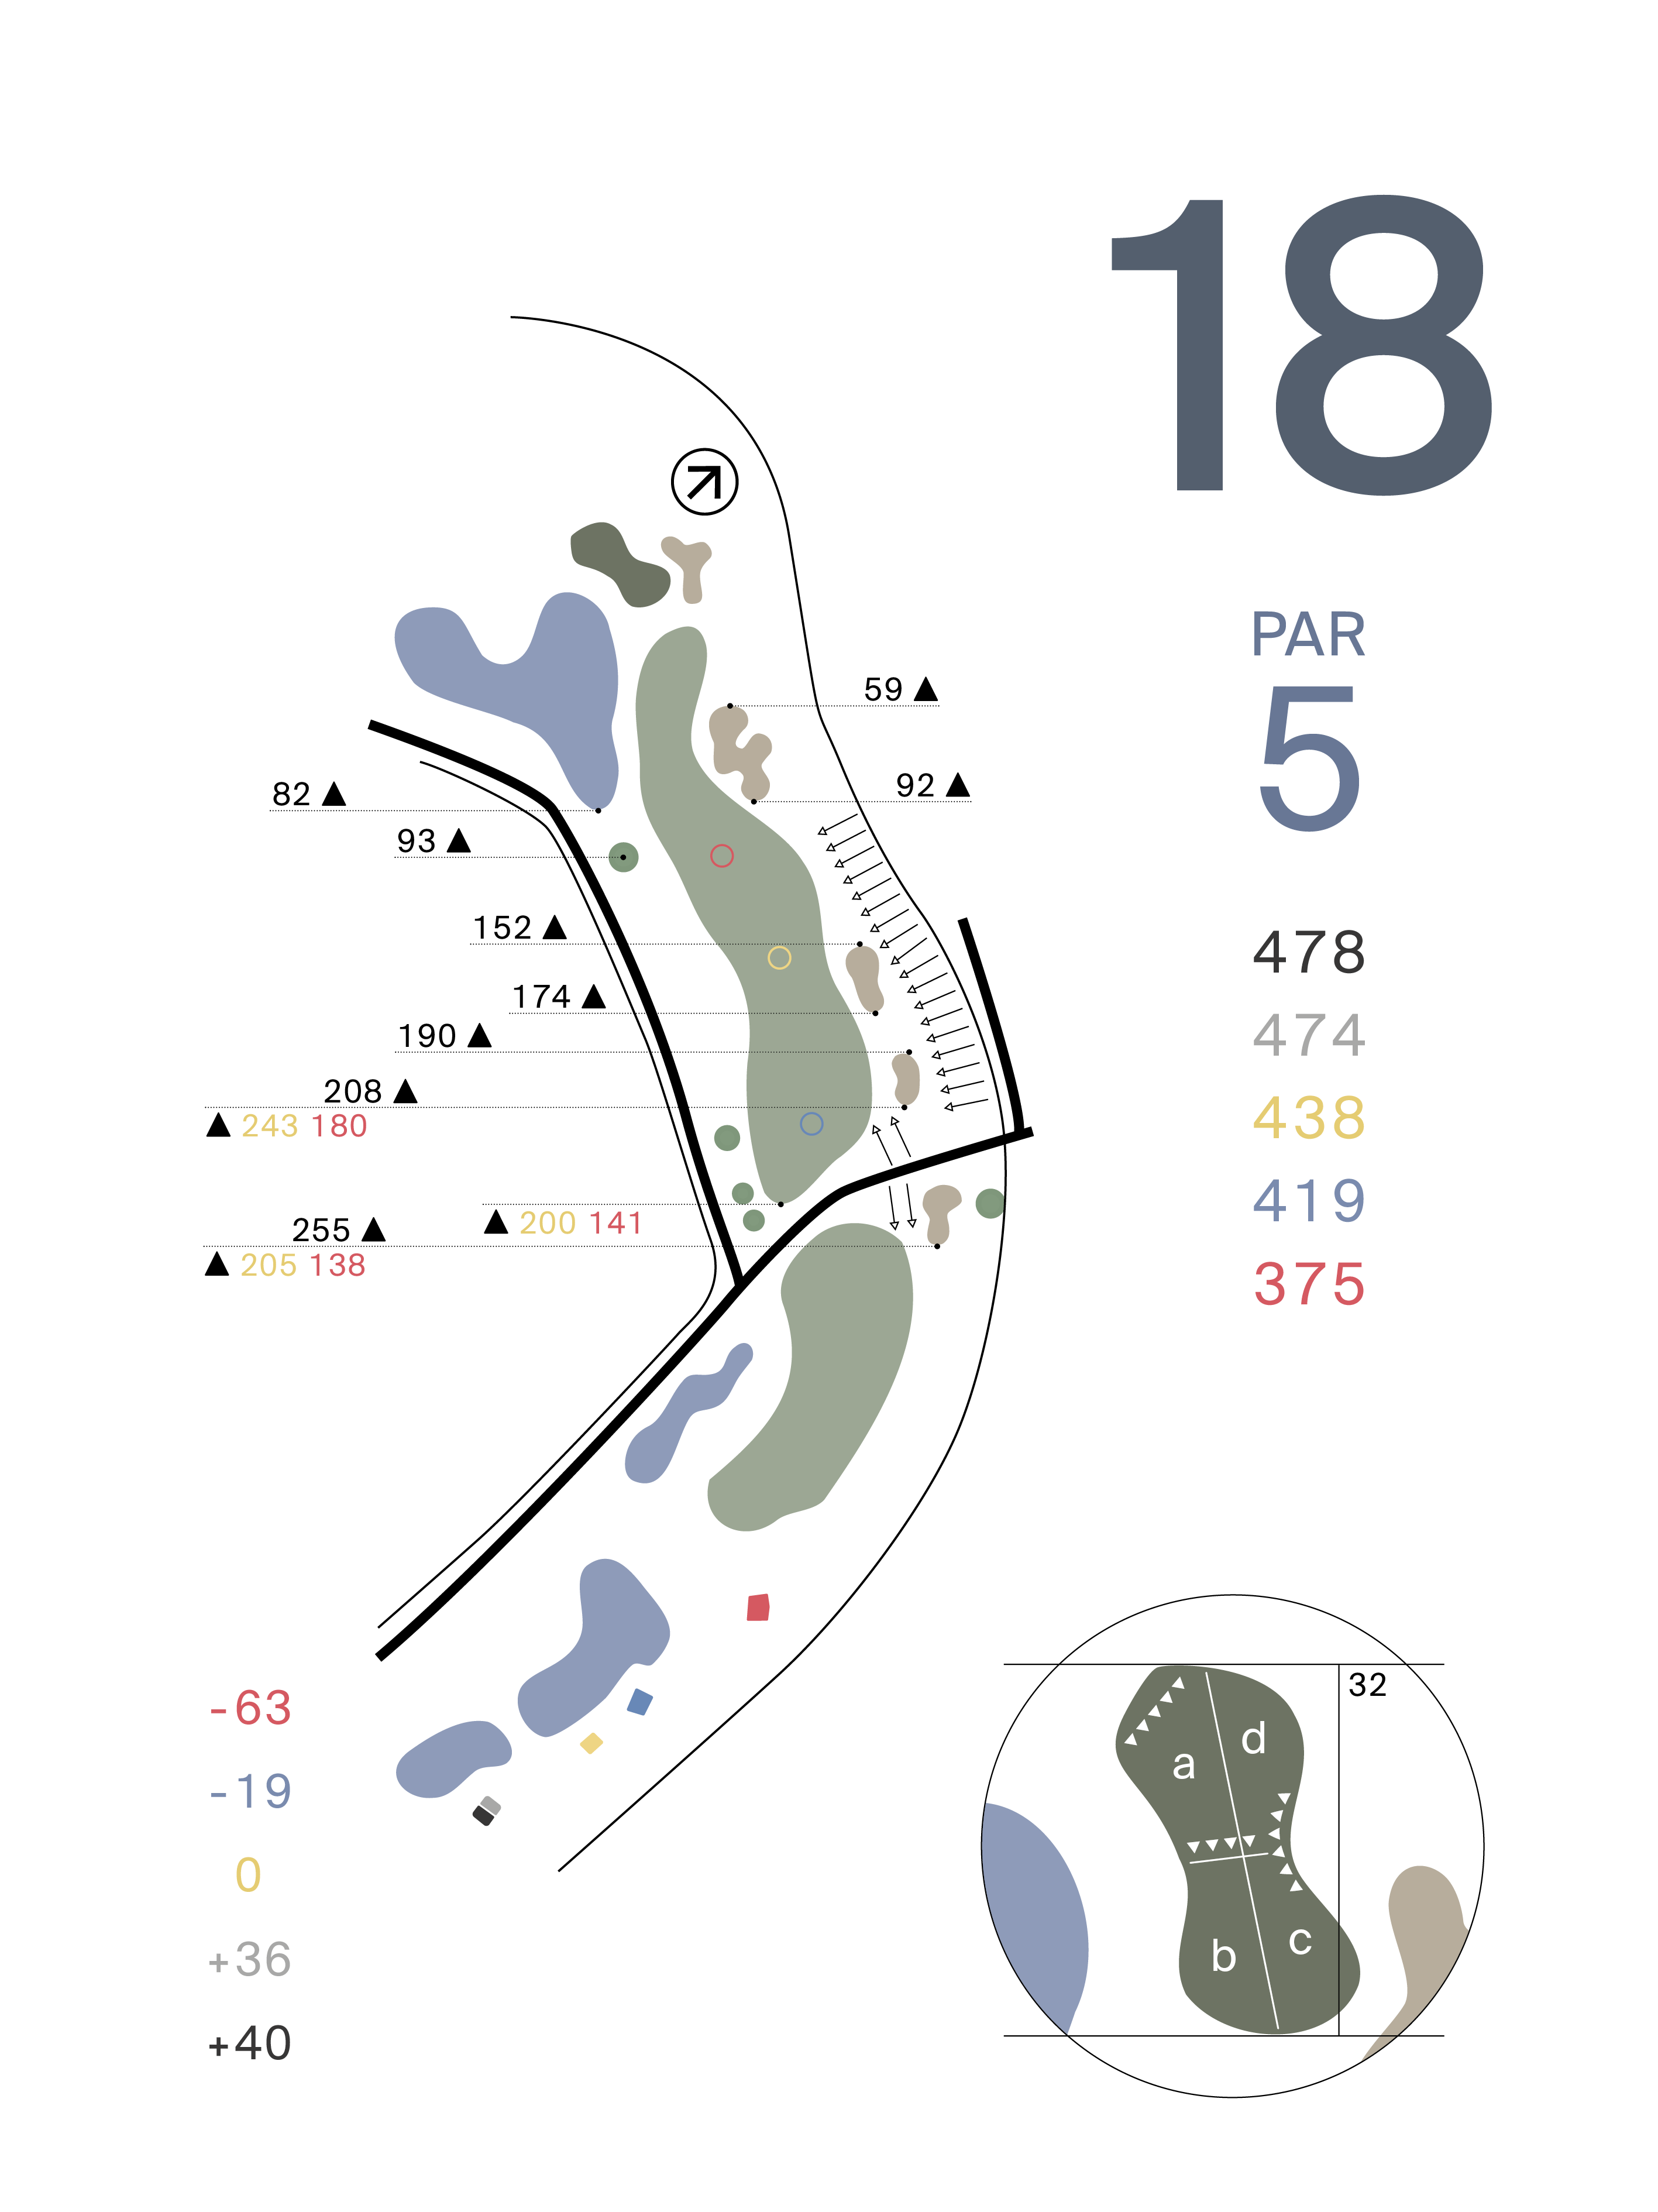
Hole 18
PAR 5
Safe play from the tee is right towards the 1st fairway bunker. An aggressive drive is left over the road. Consider the pin position on this long double green.


